1.1 安装前准备1.2 安装MySQL1.3 配置数据库1.4 数据库主从配置1.4.1 检查配置server-id参数值1.4.2 记录主从状态1.4.3 启动主从1.4.4 验证主从状态
MySQL为什么需要主从复制?
1.在一个业务复杂的系统中,有这样一种场景,一条sql语句需要锁表,导致暂时无法使用读服务,这将极大地影响业务的运行。采用主从复制,主库负责写,从库负责读。这样,即使表被锁定在主库,也可以通过读取从库来保证业务的正常运行。
2.做数据热备。
3.建筑的扩展。业务量越来越大,I/O访问的频率对于单机来说太高了。这时就需要多数据库存储来降低磁盘I/O访问的频率,提高单机的I/O性能。
MySQL主从复制概念
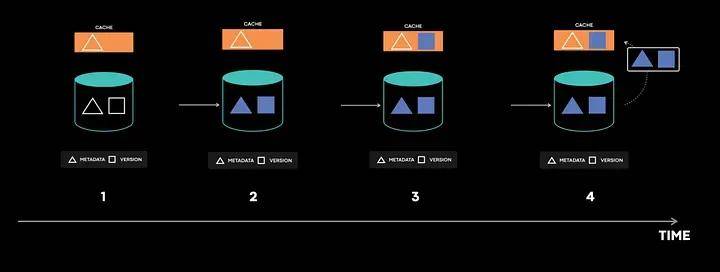
MySQL主从复制意味着数据可以从一个MySQL数据库服务器主节点复制到一个或多个从节点。MySQL默认采用异步复制,让从节点不用一直访问主服务器来更新自己的数据,数据可以在远程连接上更新。从节点可以复制主数据库中的所有数据库或特定数据库或特定表。
MySQL 主从复制主要用途
1、读写分离
2、数据实时备份,当系统中某个节点出现故障的时候,方便切换
3、高可用HA
4、架构扩展
MySQL主从形式


原理

主从复制过程


以下双主配置架构

MySQL安装
MySQL安装需要依次完成:
· 安装前准备
· 安装MYSQL
· 配置MySQL数据库
· 数据库主从配置
安装介质包包括:mysql-5.7.22-linux-glibc2.12-x86_64.tar.gz,位于安装介质包的mysql文件目录下,本次安装采用解压式安装。
MySQL安装目录为/usr/local/mysql。
MySQL数据文件存放目录为/data。
MySQL安装以主机pmondbs01为例。
在/tmp目录创建plugin目录,用于临时存放MySQL安装介质。
使用命令
执行顺序
命令
说明
1
mkdir -p /tmp/plugin
在/tmp/下创建plugin目录
执行示意
[root@pmondbs01 ~] # mkdir /tmp/plugin
然后通过FTP方式上传mysql-5.7.22-linux-glibc2.12-x86_64.tar.gz。
MySQL安装采用解压式安装,即解压之后通过修改配置文件的方式完成MySQL部署。
1. 数据库文件部署
使用命令
执行顺序
命令
说明
1
mkdir /usr/local/mysql
创建MySQL安装目录
2
cd /tmp/plugin/
进入MySQL安装介质路径/tmp/plugin
3
tar -zxf mysql-5.7.22-linux-glibc2.12-x86_64.tar.gz -C /usr/local/mysql
解压mysql-5.7.22-linux-glibc2.12-x86_64.tar.gz到/usr/local/mysql
4
mv /usr/local/mysql/mysql-5.7.22-linux-glibc2.12-x86_64/* /usr/local/mysql/
移动/usr/local/mysql/mysql-5.7.22-linux-glibc2.12-x86_64/下所有文件到/usr/local/mysql/
5
rm -rf /usr/local/mysql/mysql-5.7.22-linux-glibc2.12-x86_64/
删除/usr/local/mysql/mysql-5.7.22-linux-glibc2.12-x86_64/目录
执行示意
[root@pmondbs01 ~] # mkdir /usr/local/mysql
[root@pmondbs01 ~] # tar -zxf mysql-5.7.22-linux-glibc2.12-x86_64.tar.gz -C /usr/local/mysql
[root@pmondbs01 ~] # mv /usr/local/mysql/mysql-5.7.22-linux-glibc2.12-x86_64/* /usr/local/mysql/
[root@pmondbs01 ~] # rm -rf /usr/local/mysql/mysql-5.7.22-linux-glibc2.12-x86_64/
2. 创建数据文件目录及数据库专属用户账号
数据文件目录为/data,数据库专属用户为mysql和用户组为mysql,需要将MySQL安装目录和数据文件所在读写权限赋予用户mysql。
使用命令
执行顺序
命令
说明
1
mkdir -p /data/
创建数据文件目录
2
groupadd mysql
创建mysql用户组
3
useradd -g mysql mysql
创建mysql用户库
4
chmod -R 755 /usr/local/mysql/
赋予MySQL安装目录 /usr/local/mysql/ 775权限
5
chown -R mysql.mysql /usr/local/mysql/
改变MySQL安装目录属主为mysql
6
chmod -R 755 /data/
赋予MySQL数据文件目录 /data/ 775权限
7
chown -R mysql.mysql /data/
改变MySQL数据文件目录属主为mysql
执行示意
[root@pmondbs01 ~] # mkdir -p /data/
[root@pmondbs01 ~] # groupadd mysql
[root@pmondbs01 ~] # useradd -g mysql mysql
[root@pmondbs01 ~] # chmod -R 755 /usr/local/mysql/
[root@pmondbs01 ~] # chown -R mysql.mysql /usr/local/mysql/
[root@pmondbs01 ~] # chmod -R 755 /data/
[root@pmondbs01 ~] # chown -R mysql.mysql /data/
3. 主MySQL配置文件
将安装介质中conf文件夹下my.cnf通过FTP方式上传至/etc/下,然后修改以下参数配置。
参数设置详情为:
参数所属节点
参数
值
mysqld
server-id
1
port
3306
basedir
/usr/local/mysql
datadir
/data/
使用命令
执行顺序
命令
说明
1
vi /etc/my.cnf
编辑MySQL配置文件
2
[mysqld]
server-id=1
port=3306
basedir=/usr/local/mysql
datadir= /data/
[mysqld]参数节点,需要修改=号后面的值
执行示意
[root@pmondbs01 ~] # vi /etc/my.cnf
[mysqld]
server-id=1
port=3306
basedir=/usr/local/mysql
datadir= /data/
4. 若启用MySQL主从配置,则需要修改备库MySQL配置文件my.cnf,以pmondbs02为例,需要将参数server-id的值修改为10,其他配置和主库配置保持一致。
使用命令
执行顺序
命令
说明
1
vi /etc/my.cnf
编辑MySQL配置文件
2
[mysqld]
server-id=10
[mysqld]参数节点,需要修改=号后面的值
执行示意
注意:以下操作在从MySQL数据库上执行,比如从MySQL数据库在pmondbs02主机上。
[root@pmondbs02 ~] # vi /etc/my.cnf
[mysqld]
server-id=10
注意:在备MySQL数据库上操作完毕。
5. 配置MySQL服务随操作系统启动,
配置MySQL服务随操作系统启动,需要从MySQL安装目录复制MySQL启动脚本到/etc/init.d目录下,文件名为mysqld。然后在启动脚本中添加MySQL的安装目录和数据文件目录,确认无误后保存,赋予mysqld文件755权限,然后使用chkconfig设置MySQL随操作系统启动。
MySQL启动脚本位于/usr/local/mysql/support-files/目录下,文件名为mysql.server。
MySQL启动脚本中需要修改:basedir=/usr/local/mysql和datadir=/data/。
使用命令
执行顺序
命令
说明
1
cp -af /usr/local/mysql/support-files/mysql.server /etc/init.d/mysqld
复制MySQL启动脚本mysql.server到/etc/init.d/目录下,文件名为mysqld
2
vi /etc/init.d/mysqld
编辑/etc/init.d/mysqld文件
3
basedir=/usr/local/mysql
datadir=/data/
输入内容
4
chmod 755 /etc/init.d/mysqld
赋予MySQL启动脚本755权限
5
chkconfig --add mysqld
添加MySQL启动随系统启动
6
chkconfig --level 345 mysqld on
修改MySQL启动级别
执行示意
[root@pmondbs01 ~]# cp -af /usr/local/mysql/support-files/mysql.server /etc/init.d/mysqld
[root@pmondbs01 ~]# vi /etc/init.d/mysqld
# If you change base dir, you must also change datadir. These may get
# overwritten by settings in the MySQL configuration files.
basedir=/usr/local/mysql
datadir=/data/
[root@pmondbs01 ~]# chmod 755 /etc/init.d/mysqld
[root@pmondbs01 ~]# chkconfig --add mysqld
[root@pmondbs01 ~]# chkconfig --level 345 mysqld on
6. 初始化MySQL数据库
在MySQL安装目录进入bin目录下执行带上参数执行mysqld命令完成MySQL数据库初始化。
mysqld命令初始化数据库参数为--initialize --user=mysql --basedir=/usr/local/mysql --datadir=/data。
使用命令
执行顺序
命令
说明
1
cd /usr/local/mysql/bin
进入MySQL的bin目录
2
./mysqld --initialize --user=mysql --basedir=/usr/local/mysql --datadir=/data
带参数执行mysqld
执行示意
[root@pmondbs01 ~]# cd /usr/local/mysql/bin
[root@pmondbs01 ~]# ./mysqld --initialize --user=mysql --basedir=/usr/local/mysql --datadir=/data
MySQL5.7以后root账号的密码采用启动MySQL后生成随机密码的方式,所以修改MySQL的root账号密码需要完成以下几步操作。
1. 启动MySQL服务
启动MySQL服务命令为service mysqld start。
使用命令
执行顺序
命令
说明
1
service mysqld start
启动MySQL服务
2
ln -s /tmp/mysql.sock /var/lib/mysql/mysql.sockComment by 小言: ln: 无法创建符号链接"/var/lib/mysql/mysql.sock": 没有那个文件或目录
创建/tmp/mysql.sock软链接到/var/lib/mysql/mysql.sock
执行示意
[root@pmondbs01 ~]# service mysqld start
[root@pmondbs01 ~]# ln -s /tmp/mysql.sock /var/lib/mysql/mysql.sock
2. 查询root账号临时密码
检索在MySQL数据文件目录的mysql-error.log文件可以查找到密码,密码检索关键字为“password”,关键字“password”所在行“A temporary password is generated for root@localhost:”后面为临时密码,比如“swf88nhHgx(z”为临时密码。该临时密码作为第一次使用root账号登录数据库使用的密码。
注:MySQLroot账号的临时密码是随机生成的每次安装都会产生不同的密码。
mysql-error.log位于/data/下。
使用命令
执行顺序
命令
说明
1
cat /data/mysql-error.log|grep password
读取mysql-error.log并过滤关键password
2
2020-01-08T15:48:42.569059+08:00 1 [Note] A temporary password is generated for root@localhost: swf88nhHgx(z
输出
执行示意
[root@pmondbs01 ~]# cat /data/mysql-error.log|grep password
2020-01-08T15:48:42.569059+08:00 1 [Note] A temporary password is generated for root@localhost: swf88nhHgx(z
3. 修改root账号密码
登录MySQL数据库,修改root账号密码为password,创建可以从任何主机访问数据库的root账号并设置密码为password,用于管理数据库;创建可以从任何主机访问数据库的同步账号repl并设置密码为repl,用于MySQL数据库主从同步,并给账号赋予相应权限。
登录MySQL数据库命令为mysql -uroot -p,回车之后输入密码,密码为上一步操作查询到的临时密码swf88nhHgx(z。
创建root账号并设置密码为password的SQL语句为:“create user root@'%' identified by 'password';”
授权root账号具有所有权限的SQL语句为grant all privileges on *.* to root@'%';
修改root账号密码为password的SQL语句为alter user root@localhost identified by 'password';
使用命令
执行顺序
命令
说明
1
cd /usr/local/mysql/bin
进入MySQL安装目录的bin目录下
2
./mysql -uroot -p
启动MySQL客户端
3
swf88nhHgx(z
输入root账号密码,进入MySQL命令行客户端。root账号密码在上一步骤中获取。
4
alter user root@localhost identified by 'password';
修改root账号密码为password
5
create user root@'%' identified by 'password';
创建可以从任何主机访问数据库的root账号并设置密码为password
6
grant all privileges on *.* to root@'%';
授权可以从任何主机访问数据库的root账号所有权限
7
flush privileges;
刷新数据库权限
12
flush privileges;
刷新数据库权限
13
create user repl@'%' identified by 'repl';
创建可以从任何主机访问数据库的repl账号并设置密码为reple
14
grant replication slave on *.* to 'repl'@'%';
授权可以从任何主机访问数据库的repl账号replication slave权限
15
flush privileges;
刷新数据库权限
16
quit;
退出MySQL命令行客户端
执行示意
[root@localhost ~]# cd /usr/local/mysql/bin
[root@pmondbs01 bin]# ./mysql -uroot -p
Enter password:
Welcome to the MySQL monitor. Commands end with ; or g.
Your MySQL connection id is 4
Server version: 5.7.22-log
Copyright (c) 2000, 2018, Oracle and/or its affiliates. All rights reserved.
Oracle is a registered trademark of Oracle Corporation and/or its
affiliates. Other names may be trademarks of their respective
owners.
Type 'help;' or 'h' for help. Type 'c' to clear the current input statement.
MySQL [(none)]>alter user root@localhost identified by 'password';
Query OK, 0 rows affected (0.02 sec)
MySQL [(none)]> create user root@'%' identified by 'password';
Query OK, 0 rows affected (0.05 sec)
MySQL [(none)]> grant all privileges on *.* to root@'%';
Query OK, 0 rows affected (0.06 sec)
MySQL [(none)]> flush privileges;
Query OK, 0 rows affected (0.05 sec)
MySQL [(none)]> create user 'zabbix'@localhost identified by 'zabbix';
Query OK, 0 rows affected (0.06 sec)
MySQL [(none)]> create user 'zabbix'@'%' identified by 'zabbix';
Query OK, 0 rows affected (0.06 sec)
MySQL [(none)]> grant all privileges on *.* to 'zabbix'@localhost;
Query OK, 0 rows affected, 1 warning (0.05 sec)
MySQL [(none)]> grant all privileges on *.* to 'zabbix'@'%';
Query OK, 0 rows affected (0.05 sec)
MySQL [(none)]> flush privileges;
Query OK, 0 rows affected (0.03 sec)
MySQL [(none)]> create user repl@'%' identified by 'repl';
Query OK, 0 rows affected (0.04 sec)
MySQL [(none)]> grant replication slave on *.* to 'repl'@'%';
Query OK, 0 rows affected (0.05 sec)
MySQL [(none)]> flush privileges;
Query OK, 0 rows affected (0.03 sec)
MySQL [(none)]> quit;
Bye
[root@localhost bin]#
两台MySQL数据库做主从配置,假设情况如下:
主机名
IP地址
角色
参数server-id
同步用户名
同步密码
pmondbs01
.81.49
主
1
repl
repl
pmondbs02
.81.50
从
10
repl
repl
数据库基本配置参考7.2、7.3。
数据库主从配置参数server-id的值务必不能一样。
参数server-id的值与前面章节保持一致。
检查.81.49并设置server-id参数值。
[root@pmondbs01 bin]# vi /etc/my.cnf
[mysqld]
server-id = 1
如果server-id参数值未设置为1,设置之后重启MySQL数据库,设置server-id参数值参考7.2安装MySQL。
检查.81.50并设置server-id参数值。
[root@pmondbs02 bin]# vi /etc/my.cnf
[mysqld]
server-id = 10
如果server-id参数值未设置为10,设置之后重启MySQL数据库,设置server-id参数值参考7.2安装MySQL。
重启MySQL使用命令
执行顺序
命令
说明
1
service mysqld stop
停止MySQL
2
service mysqld start
启动MySQL
执行示意,以在服务器pmondbs01上为例
[root@pmondbs01 ~] # service mysql stop
[root@pmondbs01 ~] # service mysql start
1. 登录81.49 MySQL数据库,执行show master status,检查并记录Master状态。记录File、Position,File为mysql-bin.000003,Position为194。
使用命令
执行顺序
命令
说明
1
cd /usr/local/mysql/bin
进入MySQL安装目录的bin目录下
2
./mysql -uroot -p
启动MySQL客户端
3
password
输入root账号密码,进入MySQL命令行客户端。
4
show master status;
查看Master状态
执行示意
[root@pmondbs01 ~]# cd /usr/local/mysql/bin
[root@pmondbs01 bin]# ./mysql -uroot -p
Enter password:
Welcome to the MySQL monitor. Commands end with ; or g.
Your MySQL connection id is 4
Server version: 5.7.22-log
Copyright (c) 2000, 2018, Oracle and/or its affiliates. All rights reserved.
Oracle is a registered trademark of Oracle Corporation and/or its
affiliates. Other names may be trademarks of their respective
owners.
Type 'help;' or 'h' for help. Type 'c' to clear the current input statement.
MySQL [(none)]>show master status;
+------------------+----------+--------------+------------------+---------------------------------------------------------------------------------------+
| File | Position | Binlog_Do_DB | Binlog_Ignore_DB | Executed_Gtid_Set |
+------------------+----------+--------------+------------------+---------------------------------------------------------------------------------------+
| mysql-bin.000002 | 3842 | | | 15aa5540-31fc-11ea-9d2d-84139f30d4bd:1-14,
4a871e1c-31eb-11ea-81b2-84139f30d4f5:13-15 |
+------------------+----------+--------------+------------------+---------------------------------------------------------------------------------------+
1 row in set (0.00 sec)
MySQL [(none)]>
2. 登录.81.50 MySQL数据库,执行show master status,检查并记录Master状态。记录File、Position,File为mysql-bin.000003,Position为194。
使用命令
执行顺序
命令
说明
1
cd /usr/local/mysql/bin
进入MySQL安装目录的bin目录下
2
./mysql -uroot -p
启动MySQL客户端
3
password
输入root账号密码,进入MySQL命令行客户端。
4
show master status;
查看Master状态
执行示意
[root@pmondbs02 ~]# cd /usr/local/mysql/bin
[root@pmondbs02 bin]# ./mysql -uroot -p
Enter password:
Welcome to the MySQL monitor. Commands end with ; or g.
Your MySQL connection id is 4
Server version: 5.7.22-log
Copyright (c) 2000, 2018, Oracle and/or its affiliates. All rights reserved.
Oracle is a registered trademark of Oracle Corporation and/or its
affiliates. Other names may be trademarks of their respective
owners.
Type 'help;' or 'h' for help. Type 'c' to clear the current input statement.
MySQL [(none)]>show master status;
+------------------+----------+--------------+------------------+---------------------------------------------------------------------------------------+
| File | Position | Binlog_Do_DB | Binlog_Ignore_DB | Executed_Gtid_Set |
+------------------+----------+--------------+------------------+---------------------------------------------------------------------------------------+
| mysql-bin.000003 | 3042 | | | 15aa5540-31fc-11ea-9d2d-84139f30d4bd:13-14,
4a871e1c-31eb-11ea-81b2-84139f30d4f5:1-15 |
+------------------+----------+--------------+------------------+---------------------------------------------------------------------------------------+
1 row in set (0.00 sec)
MySQL [(none)]>
master_log_file和master_log_pos参数来自7.4.2记录的File和Position。
登录.81.49MySQL数据库之后执行“change master to master_host='.4.81.50',master_user='repl',master_password='repl',master_log_file='mysql-bin.000003',master_log_pos=3042;”。
使用命令
执行顺序
命令
说明
1
cd /usr/local/mysql/bin
进入MySQL安装目录的bin目录下
2
./mysql -uroot -p
启动MySQL客户端
3
password
输入root账号密码,进入MySQL命令行客户端。
4
change master to master_host='81.50',master_user='repl',master_password='repl',master_log_file='mysql-bin.000003',master_log_pos=194;
查看Master状态
5
start slave;
启动主从同步
执行示意
MySQL [(none)]> change master to master_host='.81.50',master_user='repl',master_password='repl',master_log_file='mysql-bin.000003',master_log_pos=3042;
MySQL [(none)]>start slave;
登录.81.50MySQL数据库之后执行“change master to master_host='.81.49',master_user='repl',master_password='repl',master_log_file='mysql-bin.000002',master_log_pos=3842;”。
使用命令
执行顺序
命令
说明
1
cd /usr/local/mysql/bin
进入MySQL安装目录的bin目录下
2
./mysql -uroot -p
启动MySQL客户端
3
password
输入root账号密码,进入MySQL命令行客户端。
4
change master to master_host='.81.49',master_user='repl',master_password='repl',master_log_file='mysql-bin.000003',master_log_pos=194;
查看Master状态
5
start slave;
启动主从同步
执行示意
MySQL [(none)]> change master to master_host='.81.49',master_user='repl',master_password='repl',master_log_file='mysql-bin.000002',master_log_pos=3842;
MySQL [(none)]>start slave;
登录.81.49MySQL数据库执行命令show slave status G;,查看Slave_IO_Running、Slave_SQL_Running是否为Yes,为Yes表示主从正常执行。
执行命令:
show slave status G;
MySQL [(none)]>show slave status G;
*************************** 1. row ***************************
Slave_IO_State: WAIting for master to send event
Master_Host: .81.50
Master_User: repl
Master_Port: 3306
Connect_Retry: 60
Master_Log_File: mysql-bin.000002
Read_Master_Log_Pos: 3842
Relay_Log_File: mysql-relay.000002
Relay_Log_Pos: 764
Relay_Master_Log_File: mysql-bin.000002
Slave_IO_Running: Yes
Slave_SQL_Running: Yes
Replicate_Do_DB:
Replicate_Ignore_DB:
Replicate_Do_Table:
Replicate_Ignore_Table:
Replicate_Wild_Do_Table:
Replicate_Wild_Ignore_Table:
Last_Errno: 0
Last_Error:
Skip_Counter: 0
Exec_Master_Log_Pos: 3842
Relay_Log_Space: 967
Until_Condition: None
Until_Log_File:
Until_Log_Pos: 0
Master_SSL_Allowed: No
Master_SSL_CA_File:
Master_SSL_CA_Path:
Master_SSL_Cert:
Master_SSL_Cipher:
Master_SSL_Key:
Seconds_Behind_Master: 0
Master_SSL_Verify_Server_Cert: No
Last_IO_Errno: 0
Last_IO_Error:
Last_SQL_Errno: 0
Last_SQL_Error:
Replicate_Ignore_Server_Ids:
Master_Server_Id: 10
Master_UUID: 15aa5540-31fc-11ea-9d2d-84139f30d4bd
Master_Info_File: mysql.slave_master_info
SQL_Delay: 0
SQL_Remaining_Delay: NULL
Slave_SQL_Running_State: Slave has read all relay log; waiting for more updates
Master_Retry_Count: 86400
Master_Bind:
Last_IO_Error_Timestamp:
Last_SQL_Error_Timestamp:
Master_SSL_Crl:
Master_SSL_Crlpath:
Retrieved_Gtid_Set: 15aa5540-31fc-11ea-9d2d-84139f30d4bd:13-14
Executed_Gtid_Set: 15aa5540-31fc-11ea-9d2d-84139f30d4bd:13-14,
4a871e1c-31eb-11ea-81b2-84139f30d4f5:1-15
Auto_Position: 0
Replicate_Rewrite_DB:
Channel_Name:
Master_TLS_Version:
1 row in set (0.00 sec)
ERROR: No query specified
MySQL [(none)]>
登录.81.50MySQL数据库执行命令show slave status G;,查看Slave_IO_Running、Slave_SQL_Running是否为Yes,为Yes表示主从正常执行。
MySQL [(none)]>show slave status G;
*************************** 1. row ***************************
Slave_IO_State: Waiting for master to send event
Master_Host: .81.49
Master_User: repl
Master_Port: 3306
Connect_Retry: 60
Master_Log_File: mysql-bin.000003
Read_Master_Log_Pos: 3842
Relay_Log_File: mysql-relay.000002
Relay_Log_Pos: 1025
Relay_Master_Log_File: mysql-bin.000003
Slave_IO_Running: Yes
Slave_SQL_Running: Yes
Replicate_Do_DB:
Replicate_Ignore_DB:
Replicate_Do_Table:
Replicate_Ignore_Table:
Replicate_Wild_Do_Table:
Replicate_Wild_Ignore_Table:
Last_Errno: 0
Last_Error:
Skip_Counter: 0
Exec_Master_Log_Pos: 3842
Relay_Log_Space: 1228
Until_Condition: None
Until_Log_File:
Until_Log_Pos: 0
Master_SSL_Allowed: No
Master_SSL_CA_File:
Master_SSL_CA_Path:
Master_SSL_Cert:
Master_SSL_Cipher:
Master_SSL_Key:
Seconds_Behind_Master: 0
Master_SSL_Verify_Server_Cert: No
Last_IO_Errno: 0
Last_IO_Error:
Last_SQL_Errno: 0
Last_SQL_Error:
Replicate_Ignore_Server_Ids:
Master_Server_Id: 1
Master_UUID: 4a871e1c-31eb-11ea-81b2-84139f30d4f5
Master_Info_File: mysql.slave_master_info
SQL_Delay: 0
SQL_Remaining_Delay: NULL
Slave_SQL_Running_State: Slave has read all relay log; waiting for more updates
Master_Retry_Count: 86400
Master_Bind:
Last_IO_Error_Timestamp:
Last_SQL_Error_Timestamp:
Master_SSL_Crl:
Master_SSL_Crlpath:
Retrieved_Gtid_Set: 4a871e1c-31eb-11ea-81b2-84139f30d4f5:13-15
Executed_Gtid_Set: 15aa5540-31fc-11ea-9d2d-84139f30d4bd:1-14,
4a871e1c-31eb-11ea-81b2-84139f30d4f5:13-15
Auto_Position: 0
Replicate_Rewrite_DB:
Channel_Name:
Master_TLS_Version:
1 row in set (0.00 sec)
ERROR:
No query specified
MySQL [(none)]>zh