虽然现在springboot微服务纵横都是用的jar包,但是还有很多使用的Tomcat。tomcat是servlet的容器,也是springboot默认集成的容器,有必要对他的网络线程模型做一下了解。

(一) tomcat网络处理线程模型
一个请求,一个工作线程,CPU利用率低,tomcat7以下才使用这种,新版本不再使用,tomcat8默认NIO

apr(Apache Portable Runtime/Apache可以执行运行库),Apache Http服务器的支持库。JINI的行还是调用Apache Http服务器的核心动态链接库来处理文件读取或者网络传输操作,tomcat 默认监听指定路径,如果有apr安全,则自动启用。

tomcat8开始,默认NIO方式,非阻塞读取请求信息,非堵塞处理下一个请求,完全异步。


不能靠经验猜测,需要不断调试,找出适应应用程序的合理配置。
tomcat能够接受到的连接数,acceptCount和connections,一个用户请求连接到accept queue队列,代表捂手成功,通过tcp的形式,收到一个通知给tomcat。 tomcat收到请求数量是根据1万,这1万个请求正在处理,线程,如果tomcat已经满了,请求都堆积到操作系统里面,操作系统acceptCount就是控制堆积数量的。windows这块,操作系统堆满了,tcp这块也堆满了直接关闭了请求了。
linux这块,不仅仅有队列,还有个tcp握手过程中的一个syn queue,linux也会在syn queue,这属于系统内核。

总共连接数 = acceptCount+ connections
connections: Tomcat能接收的请求限制。
acceptCount: 超过Tomcat能接收的请求数以后,堆积在操作系统的数量(windows 和 linux 略有不同)。
什么时候需要调整connections?如何调整?
connections小于maxThread的时候,需要调大,最好是比预期的最高并发数要大20%;反 正是堆积到tomcat的work处理线程池中(堆积占内存)。举个简单的例子:cpu数量是5 maxThread是5,结果连接数据connections只有3,这不是浪费的了吗?直接调整connections的数量。
什么时候需要调整acceptCount?
想受理更多用户请求,却又不想堆积在tomcat中,利用操作系统来高效的堆积,可以调整为 最高并发数 connections; 实际上不需要调整,tomcat默认100,linux默认128;最好是把连接控制交给应用程序,这 样方便管理。这是操作系统层面的,调整的比较少。一般都是调整connections。
SpringBoot的参数配置
JAVA -jar webdemo1.1.0.jar --server.tomcat.maxconnections=1 -- server.tomcat.acceptCount=1
并发处理线程数调整
线程太少,CPU利用率过低,程序的吞吐量变小,资源浪费,容易堆积。
线程太多,上下文频繁切换,性能反而变低。
线程数调为多少合适?
场景代入:服务器配置2核,不考虑内存问题。
收到请求,java代码执行耗时50ms,等待数 据返回50ms。
理想的线程数量= (1 + 代码阻塞时间/代码执行时间) * cpu数量 。
实际情况是跑起代码,压测环境进行调试。不断调整线程数,将CPU打到80~90%的利用率。
SpringBoot的参数配置
java -jar web-demo-1.1.0.jar --server.tomcat.maxThreads=500
有一家足疗店,只有两个足浴的位置。
假设一个足浴技师,接待一个客人需要30分钟,接待一个客人后,休息30分钟。
请问:这家需要几个技师?4个技师

一个线程在一个cpu里面执行,请求执行需要50毫秒,休息50毫秒,理想的线程数量就是
cpu的数量 * (1+ 50ms/50ms),1个cpu就是2个线程。
(二)示例
WebDemoApplication
import org.springframework.boot.SpringApplication;
import org.springframework.boot.autoconfigure.SpringBootApplication;
import org.springframework.scheduling.annotation.EnableAsync;
import org.springframework.web.bind.annotation.RequestMapping;
import org.springframework.web.bind.annotation.RestController;

import java.util.Random;
import java.util.concurrent.Callable;

@SpringBootApplication
@RestController
@EnableAsync
public class WebDemoApplication {
 public static void main(String[] args) {
 SpringApplication.run(WebDemoApplication.class, args);
 }

 // 这个方法固定延时3秒,用于测试线程/连接数量控制
 @RequestMapping("/testCount")
 public String testCount() throws InterruptedException {
 Thread.sleep(3000);// connections acceptCount
 return "Success";
 }

 @RequestMapping("/test")
 public String benchmark() throws InterruptedException {
 System.out.println("访问test:" + Thread.currentThread().getName());

 // 这段代码,一直运算。
 for (int i = 0; i < 200000; i++) {
 new Random().nextInt();
 }
 // 50毫秒的数据库等待,线程不干活
 Thread.sleep(50L);
 return "Success";
 }

 // 异步支持
 @RequestMapping("/testAsync")
 public Callable<String> benchmarkAsync() throws InterruptedException {
 return new Callable<String>() {
 @Override
 public String call() throws Exception {
 System.out.println("访问testAsync:" + Thread.currentThread().getName());
 // 这段代码,一直运算。
 for (int i = 0; i < 200000; i++) {
 new Random().nextInt();
 }
 // 50毫秒的数据库等待,线程不干活
 Thread.sleep(50L);
 return "Success";
 }
 };
 }
}
application.yml
server:
 port: 8080
pom.xml
<?xml version="1.0" encoding="UTF-8"?>
<project xmlns="http://maven.apache.org/POM/4.0.0"
 xmlns:xsi="http://www.w3.org/2001/XMLSchema-instance"
 xsi:schemaLocation="http://maven.apache.org/POM/4.0.0 http://maven.apache.org/xsd/maven-4.0.0.xsd">
 <modelVersion>4.0.0</modelVersion>

 <groupId>com.study.chapter-3</groupId>
 <artifactId>web-demo</artifactId>
 <version>1.1.0</version>

 <name>web-demo</name>
 <description>Tomcat调优代码</description>

 <parent>
 <groupId>org.springframework.boot</groupId>
 <artifactId>spring-boot-starter-parent</artifactId>
 <version>2.0.6.RELEASE</version>
 <relativePath/> <!-- lookup parent from repository -->
 </parent>

 <properties>
 <project.build.sourceEncoding>UTF-8</project.build.sourceEncoding>
 <project.reporting.outputEncoding>UTF-8</project.reporting.outputEncoding>
 <java.version>1.8</java.version>
 </properties>

 <dependencies>
 <dependency>
 <groupId>org.springframework.boot</groupId>
 <artifactId>spring-boot-starter-web</artifactId>
 </dependency>
 <dependency>
 <groupId>org.springframework.boot</groupId>
 <artifactId>spring-boot-starter-test</artifactId>
 <scope>test</scope>
 </dependency>
 <dependency>
 <groupId>org.springframework.boot</groupId>
 <artifactId>spring-boot-configuration-processor</artifactId>
 <optional>true</optional>
 </dependency>
 </dependencies>

 <build>
 <plugins>
 <plugin>
 <groupId>org.springframework.boot</groupId>
 <artifactId>spring-boot-maven-plugin</artifactId>
 </plugin>
 </plugins>
 </build>
</project>

https://mirrors.tuna.tsinghua.edu.cn/apache//jmeter/binaries/


jmeter的测试脚本,使用的时候保存成jmx,使用的时候加载这个jmx
<?xml version="1.0" encoding="UTF-8"?>
<jmeterTestPlan version="1.2" properties="5.0" jmeter="5.0 r1840935">
 <hashTree>
 <TestPlan guiclass="TestPlanGui" testclass="TestPlan" testname="测试计划" enabled="true">
 <stringProp name="TestPlan.comments"></stringProp>
 <boolProp name="TestPlan.functional_mode">false</boolProp>
 <boolProp name="TestPlan.tearDown_on_shutdown">true</boolProp>
 <boolProp name="TestPlan.serialize_threadgroups">false</boolProp>
 <elementProp name="TestPlan.user_defined_variables" elementType="Arguments" guiclass="ArgumentsPanel" testclass="Arguments" testname="用户定义的变量" enabled="true">
 <collectionProp name="Arguments.arguments"/>
 </elementProp>
 <stringProp name="TestPlan.user_define_classpath"></stringProp>
 </TestPlan>
 <hashTree>
 <ThreadGroup guiclass="ThreadGroupGui" testclass="ThreadGroup" testname="数量测试" enabled="true">
 <stringProp name="ThreadGroup.on_sample_error">continue</stringProp>
 <elementProp name="ThreadGroup.main_controller" elementType="LoopController" guiclass="LoopControlPanel" testclass="LoopController" testname="循环控制器" enabled="true">
 <boolProp name="LoopController.continue_forever">false</boolProp>
 <stringProp name="LoopController.loops">1</stringProp>
 </elementProp>
 <stringProp name="ThreadGroup.num_threads">10</stringProp>
 <stringProp name="ThreadGroup.ramp_time">1</stringProp>
 <boolProp name="ThreadGroup.scheduler">false</boolProp>
 <stringProp name="ThreadGroup.duration"></stringProp>
 <stringProp name="ThreadGroup.delay"></stringProp>
 </ThreadGroup>
 <hashTree>
 <HTTPSamplerProxy guiclass="HttpTestSampleGui" testclass="HTTPSamplerProxy" testname="HTTP请求" enabled="true">
 <elementProp name="HTTPsampler.Arguments" elementType="Arguments" guiclass="HTTPArgumentsPanel" testclass="Arguments" testname="用户定义的变量" enabled="true">
 <collectionProp name="Arguments.arguments"/>
 </elementProp>
 <stringProp name="HTTPSampler.domain">127.0.0.1</stringProp>
 <stringProp name="HTTPSampler.port">8080</stringProp>
 <stringProp name="HTTPSampler.protocol">http</stringProp>
 <stringProp name="HTTPSampler.contentEncoding"></stringProp>
 <stringProp name="HTTPSampler.path">/testCount</stringProp>
 <stringProp name="HTTPSampler.method">GET</stringProp>
 <boolProp name="HTTPSampler.follow_redirects">true</boolProp>
 <boolProp name="HTTPSampler.auto_redirects">false</boolProp>
 <boolProp name="HTTPSampler.use_keepalive">true</boolProp>
 <boolProp name="HTTPSampler.DO_MULTIPART_POST">false</boolProp>
 <stringProp name="HTTPSampler.embedded_url_re"></stringProp>
 <stringProp name="HTTPSampler.connect_timeout"></stringProp>
 <stringProp name="HTTPSampler.response_timeout"></stringProp>
 </HTTPSamplerProxy>
 <hashTree/>
 <ResultCollector guiclass="ViewResultsFullVisualizer" testclass="ResultCollector" testname="察看结果树" enabled="true">
 <boolProp name="ResultCollector.error_logging">false</boolProp>
 <objProp>
 <name>saveConfig</name>
 <value class="SampleSaveConfiguration">
 <time>true</time>
 <latency>true</latency>
 <timestamp>true</timestamp>
 <success>true</success>
 <label>true</label>
 <code>true</code>
 <message>true</message>
 <threadName>true</threadName>
 <dataType>true</dataType>
 <encoding>false</encoding>
 <assertions>true</assertions>
 <subresults>true</subresults>
 <responseData>false</responseData>
 <samplerData>false</samplerData>
 <xml>false</xml>
 <fieldNames>true</fieldNames>
 <responseHeaders>false</responseHeaders>
 <requestHeaders>false</requestHeaders>
 <responseDataOnError>false</responseDataOnError>
 <saveAssertionResultsFailureMessage>true</saveAssertionResultsFailureMessage>
 <assertionsResultsToSave>0</assertionsResultsToSave>
 <bytes>true</bytes>
 <sentBytes>true</sentBytes>
 <url>true</url>
 <threadCounts>true</threadCounts>
 <idleTime>true</idleTime>
 <connectTime>true</connectTime>
 </value>
 </objProp>
 <stringProp name="filename"></stringProp>
 </ResultCollector>
 <hashTree/>
 </hashTree>
 <ThreadGroup guiclass="ThreadGroupGui" testclass="ThreadGroup" testname="参数调优测试用例" enabled="true">
 <stringProp name="ThreadGroup.on_sample_error">continue</stringProp>
 <elementProp name="ThreadGroup.main_controller" elementType="LoopController" guiclass="LoopControlPanel" testclass="LoopController" testname="循环控制器" enabled="true">
 <boolProp name="LoopController.continue_forever">false</boolProp>
 <stringProp name="LoopController.loops">10</stringProp>
 </elementProp>
 <stringProp name="ThreadGroup.num_threads">1000</stringProp>
 <stringProp name="ThreadGroup.ramp_time">1</stringProp>
 <boolProp name="ThreadGroup.scheduler">false</boolProp>
 <stringProp name="ThreadGroup.duration"></stringProp>
 <stringProp name="ThreadGroup.delay"></stringProp>
 </ThreadGroup>
 <hashTree>
 <HTTPSamplerProxy guiclass="HttpTestSampleGui" testclass="HTTPSamplerProxy" testname="HTTP请求" enabled="true">
 <elementProp name="HTTPsampler.Arguments" elementType="Arguments" guiclass="HTTPArgumentsPanel" testclass="Arguments" testname="用户定义的变量" enabled="true">
 <collectionProp name="Arguments.arguments"/>
 </elementProp>
 <stringProp name="HTTPSampler.domain">192.168.100.241</stringProp>
 <stringProp name="HTTPSampler.port">8080</stringProp>
 <stringProp name="HTTPSampler.protocol">http</stringProp>
 <stringProp name="HTTPSampler.contentEncoding"></stringProp>
 <stringProp name="HTTPSampler.path">test</stringProp>
 <stringProp name="HTTPSampler.method">GET</stringProp>
 <boolProp name="HTTPSampler.follow_redirects">true</boolProp>
 <boolProp name="HTTPSampler.auto_redirects">false</boolProp>
 <boolProp name="HTTPSampler.use_keepalive">true</boolProp>
 <boolProp name="HTTPSampler.DO_MULTIPART_POST">false</boolProp>
 <stringProp name="HTTPSampler.embedded_url_re"></stringProp>
 <stringProp name="HTTPSampler.connect_timeout"></stringProp>
 <stringProp name="HTTPSampler.response_timeout"></stringProp>
 </HTTPSamplerProxy>
 <hashTree/>
 <ResultCollector guiclass="StatVisualizer" testclass="ResultCollector" testname="聚合报告" enabled="true">
 <boolProp name="ResultCollector.error_logging">false</boolProp>
 <objProp>
 <name>saveConfig</name>
 <value class="SampleSaveConfiguration">
 <time>true</time>
 <latency>true</latency>
 <timestamp>true</timestamp>
 <success>true</success>
 <label>true</label>
 <code>true</code>
 <message>true</message>
 <threadName>true</threadName>
 <dataType>true</dataType>
 <encoding>false</encoding>
 <assertions>true</assertions>
 <subresults>true</subresults>
 <responseData>false</responseData>
 <samplerData>false</samplerData>
 <xml>false</xml>
 <fieldNames>true</fieldNames>
 <responseHeaders>false</responseHeaders>
 <requestHeaders>false</requestHeaders>
 <responseDataOnError>false</responseDataOnError>
 <saveAssertionResultsFailureMessage>true</saveAssertionResultsFailureMessage>
 <assertionsResultsToSave>0</assertionsResultsToSave>
 <bytes>true</bytes>
 <sentBytes>true</sentBytes>
 <url>true</url>
 <threadCounts>true</threadCounts>
 <idleTime>true</idleTime>
 <connectTime>true</connectTime>
 </value>
 </objProp>
 <stringProp name="filename"></stringProp>
 </ResultCollector>
 <hashTree/>
 <ResultCollector guiclass="ViewResultsFullVisualizer" testclass="ResultCollector" testname="察看结果树" enabled="true">
 <boolProp name="ResultCollector.error_logging">false</boolProp>
 <objProp>
 <name>saveConfig</name>
 <value class="SampleSaveConfiguration">
 <time>true</time>
 <latency>true</latency>
 <timestamp>true</timestamp>
 <success>true</success>
 <label>true</label>
 <code>true</code>
 <message>true</message>
 <threadName>true</threadName>
 <dataType>true</dataType>
 <encoding>false</encoding>
 <assertions>true</assertions>
 <subresults>true</subresults>
 <responseData>false</responseData>
 <samplerData>false</samplerData>
 <xml>false</xml>
 <fieldNames>true</fieldNames>
 <responseHeaders>false</responseHeaders>
 <requestHeaders>false</requestHeaders>
 <responseDataOnError>false</responseDataOnError>
 <saveAssertionResultsFailureMessage>true</saveAssertionResultsFailureMessage>
 <assertionsResultsToSave>0</assertionsResultsToSave>
 <bytes>true</bytes>
 <sentBytes>true</sentBytes>
 <url>true</url>
 <threadCounts>true</threadCounts>
 <idleTime>true</idleTime>
 <connectTime>true</connectTime>
 </value>
 </objProp>
 <stringProp name="filename"></stringProp>
 </ResultCollector>
 <hashTree/>
 </hashTree>
 <ThreadGroup guiclass="ThreadGroupGui" testclass="ThreadGroup" testname="异步Servlet参数调优测试用例" enabled="true">
 <stringProp name="ThreadGroup.on_sample_error">continue</stringProp>
 <elementProp name="ThreadGroup.main_controller" elementType="LoopController" guiclass="LoopControlPanel" testclass="LoopController" testname="循环控制器" enabled="true">
 <boolProp name="LoopController.continue_forever">false</boolProp>
 <stringProp name="LoopController.loops">1</stringProp>
 </elementProp>
 <stringProp name="ThreadGroup.num_threads">1000</stringProp>
 <stringProp name="ThreadGroup.ramp_time">2</stringProp>
 <boolProp name="ThreadGroup.scheduler">false</boolProp>
 <stringProp name="ThreadGroup.duration"></stringProp>
 <stringProp name="ThreadGroup.delay"></stringProp>
 </ThreadGroup>
 <hashTree>
 <HTTPSamplerProxy guiclass="HttpTestSampleGui" testclass="HTTPSamplerProxy" testname="HTTP请求" enabled="true">
 <elementProp name="HTTPsampler.Arguments" elementType="Arguments" guiclass="HTTPArgumentsPanel" testclass="Arguments" testname="用户定义的变量" enabled="true">
 <collectionProp name="Arguments.arguments"/>
 </elementProp>
 <stringProp name="HTTPSampler.domain">127.0.0.1</stringProp>
 <stringProp name="HTTPSampler.port">8080</stringProp>
 <stringProp name="HTTPSampler.protocol">http</stringProp>
 <stringProp name="HTTPSampler.contentEncoding"></stringProp>
 <stringProp name="HTTPSampler.path">testAsync</stringProp>
 <stringProp name="HTTPSampler.method">GET</stringProp>
 <boolProp name="HTTPSampler.follow_redirects">true</boolProp>
 <boolProp name="HTTPSampler.auto_redirects">false</boolProp>
 <boolProp name="HTTPSampler.use_keepalive">true</boolProp>
 <boolProp name="HTTPSampler.DO_MULTIPART_POST">false</boolProp>
 <stringProp name="HTTPSampler.embedded_url_re"></stringProp>
 <stringProp name="HTTPSampler.connect_timeout"></stringProp>
 <stringProp name="HTTPSampler.response_timeout"></stringProp>
 </HTTPSamplerProxy>
 <hashTree/>
 <ResultCollector guiclass="StatVisualizer" testclass="ResultCollector" testname="聚合报告" enabled="true">
 <boolProp name="ResultCollector.error_logging">false</boolProp>
 <objProp>
 <name>saveConfig</name>
 <value class="SampleSaveConfiguration">
 <time>true</time>
 <latency>true</latency>
 <timestamp>true</timestamp>
 <success>true</success>
 <label>true</label>
 <code>true</code>
 <message>true</message>
 <threadName>true</threadName>
 <dataType>true</dataType>
 <encoding>false</encoding>
 <assertions>true</assertions>
 <subresults>true</subresults>
 <responseData>false</responseData>
 <samplerData>false</samplerData>
 <xml>false</xml>
 <fieldNames>true</fieldNames>
 <responseHeaders>false</responseHeaders>
 <requestHeaders>false</requestHeaders>
 <responseDataOnError>false</responseDataOnError>
 <saveAssertionResultsFailureMessage>true</saveAssertionResultsFailureMessage>
 <assertionsResultsToSave>0</assertionsResultsToSave>
 <bytes>true</bytes>
 <sentBytes>true</sentBytes>
 <url>true</url>
 <threadCounts>true</threadCounts>
 <idleTime>true</idleTime>
 <connectTime>true</connectTime>
 </value>
 </objProp>
 <stringProp name="filename"></stringProp>
 </ResultCollector>
 <hashTree/>
 </hashTree>
 </hashTree>
 </hashTree>
</jmeterTestPlan>
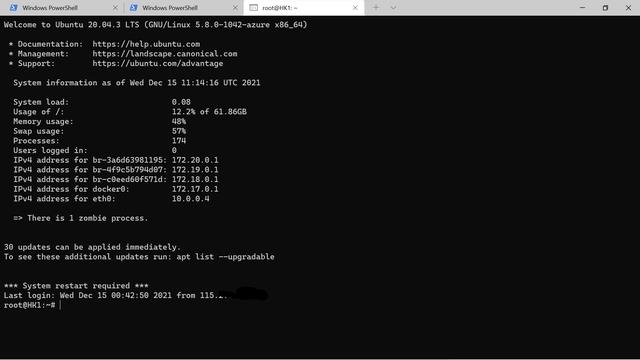
一台双核4g的虚拟机,里面已经安装好了jdk8。上边代码的jar上传到虚拟机上。
java -jar web-demo-1.1.0.jar --server.tomcat.maxThreads=10 --server.tomcat.maxConnections=2 --server.tomcat.acceptCount=3

jmeter加载上边写的测试脚本,修改服务器IP

linux环境下,最大连接数是2,acceptCount=3,来了10个线程进行操作,每次操作2个,最后应该处理5个,因为2+3 =5,但是linux有等待机制。所以全部都处理完了。

试试windows的环境下,启动命令跟linux一样。最大连接数是2,acceptCount=3,来了10个线程进行操作,每次操作2个,windows确实就处理了5个,剩余的直接抛弃掉了。

最大线程设置成4个。
java -jar web-demo-1.1.0.jar --server.tomcat.maxThreads=4
cpu利用率60.9% 有异常数据0.27%,响应的平均时间21s。


最大线程设置成200个。
java -jar web-demo-1.1.0.jar --server.tomcat.maxThreads=200
cpu利用率很高,但是异常数据很高。吞吐量变高99.9/sec。


就是不停的更换这个maxThreads 查看jmeter的结果,因为我是虚机很难很好的测试出结果
PS:请求多,CPU占用率高了,如果能接受很慢的响应,就加大。 否则就集群分流认清现实,优化代码才是王道,配置只能是锦上添花!tomcat基本不是单独使用的,基本要跟Nginx配合的,ngxin负责限流+日志记录。