想要阅读Netty源码的同学,建议从GitHub上把源码拉下来,方便写注释、Debug调试哦~点我去下载!
先来看一个简单的Echo服务端程序,监听本地的9999端口,有客户端接入时控制台输出一句话,接收到客户端的数据后直接原样写回。
public class EchoServer {
// 绑定的端口
private final int port;
public EchoServer(int port) {
this.port = port;
}
public static void main(String[] args) {
// 启动Echo服务
new EchoServer(9999).start();
}
public void start() {
/*
bossGroup负责客户端的接入
workerGroup负责IO数据的读写
*/
NioEventLoopGroup boss = new NioEventLoopGroup(1);
NioEventLoopGroup worker = new NioEventLoopGroup();
new ServerBootstrap()
.group(boss, worker)
.channel(NIOServerSocketChannel.class)
.childHandler(new ChannelInitializer<SocketChannel>() {
@Override
protected void initChannel(SocketChannel sc) throws Exception {
sc.pipeline().addLast(new ChannelInboundHandlerAdapter(){
@Override
public void channelActive(ChannelHandlerContext ctx) throws Exception {
super.channelActive(ctx);
System.out.println("有新的客户端连接...");
}
@Override
public void channelRead(ChannelHandlerContext ctx, Object msg) throws Exception {
/*
原样写回给客户端,因为OutBoundHandler还要使用,因此不能释放msg。
底层数据写完后会自动释放。
*/
ctx.writeAndFlush(msg);
}
@Override
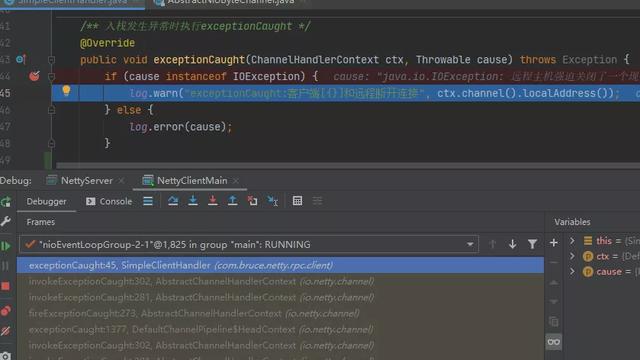
public void exceptionCaught(ChannelHandlerContext ctx, Throwable cause) throws Exception {
// 出现异常了
cause.printStackTrace();
ctx.channel().close();
}
});
}
})
.bind(port);
}
}
代码还是很简单的,接下来会一步步分析,仅仅几行代码,Netty到底做了什么!
Netty程序要想成功运行,需要EventLoopGroup进行驱动,ServerBootstrap.bind()会将ServerSocketChannel绑定到本地端口,这样服务端就可以接收客户端的连接了,但是在这之前,必须确保设置了EventLoopGroup,ServerBootstrap调用bind()前会进行检查,方法是validate(),源码如下:
/**
* 验证必要的参数
*/
public B validate() {
    if (group == null) {//EventLoopGroup必须设置,依赖它驱动程序
        throw new IllegalStateException("group not set");
    }
    if (channelFactory == null) {//依赖channelFactory创建ServerSocketChannel对象
        throw new IllegalStateException("channel or channelFactory not set");
    }
    return self();
}
先来看看类的继承关系:
NioEventLoopGroup实现了ScheduledExecutorService,说明它不仅可以执行异步任务,还可以执行定时任务。实现Iterable接口,是因为EventLoopGroup管理着一组EventLoop,需要对其进行迭代遍历。
MultithreadEventExecutorGroup代表它是一个多线程的事件执行器,而它管理的EventLoop就是个单线程的事件执行器。
先来看构造函数,它的构造函数非常多,我们直接看参数最全的一个:
/**
 * @param nThreads 线程数量,就是NioEventLoop的数量,默认CPU核心数*2
 * @param executor NioEventLoop.run()的执行者,默认为ThreadPerTaskExecutor,NioEventLoop将利用它来启动一个FastThreadLocalThread并执行
 * @param chooserFactory 选择器工厂,默认DefaultEventExecutorChooserFactory,轮询选择NioEventLoop
 * @param selectorProvider 多路复用器提供者,DefaultSelectorProvider.create()
 * @param selectStrategyFactory select策略工厂,指示EventLoop应该要做什么事情
 * @param rejectedExecutionHandler 拒绝策略
 * @param taskQueueFactory 任务队列工厂,默认PlatformDependent.newMpscQueue(),Netty实现的高性能无锁队列
 */
public NioEventLoopGroup(int nThreads, Executor executor, EventExecutorChooserFactory chooserFactory,
                         final SelectorProvider selectorProvider,
                         final SelectStrategyFactory selectStrategyFactory,
                         final RejectedExecutionHandler rejectedExecutionHandler,
                         final EventLoopTaskQueueFactory taskQueueFactory) {
    super(nThreads, executor, chooserFactory, selectorProvider, selectStrategyFactory,
            rejectedExecutionHandler, taskQueueFactory);
}
NioEventLoopGroup会把参数传给父类构造器MultithreadEventLoopGroup,这里会对nThreads进行初始化设置:
/**
* 参数太多,以后也可能会改变,后面的参数直接用Object...接收了
*/
protected MultithreadEventLoopGroup(int nThreads, Executor executor, EventExecutorChooserFactory chooserFactory,
                                    Object... args) {
    // 如果nThreads=0,则默认为CPU核心数*2
    super(nThreads == 0 ? DEFAULT_EVENT_LOOP_THREADS : nThreads, executor, chooserFactory, args);
}
再次调用父类构造器,核心初始化流程在
MultithreadEventExecutorGroup中:
/*
创建一个多线程的事件执行器组
 */
protected MultithreadEventExecutorGroup(int nThreads, Executor executor,
                                        EventExecutorChooserFactory chooserFactory, Object... args) {
    // 确保线程数大于0
    checkPositive(nThreads, "nThreads");

    /*
    如果没提供Executor,则创建默认的ThreadPerTaskExecutor。
    ThreadPerTaskExecutor依赖于一个ThreadFactory,靠它创建线程来执行任务。
    默认的ThreadFactory会使用FastThreadLocalThread来提升FastThreadLocal的性能。
     */
    if (executor == null) {
        executor = new ThreadPerTaskExecutor(newDefaultThreadFactory());
    }

    // 创建子EventExecutor
    children = new EventExecutor[nThreads];
    for (int i = 0; i < nThreads; i++) {
        boolean success = false;
        try {
            children[i] = newChild(executor, args);
            success = true;
        } catch (Exception e) {
            // TODO: Think about if this is a good exception type
            throw new IllegalStateException("failed to create a child event loop", e);
        } finally {
            if (!success) {
                // EventExecutor创建失败,停机释放资源
                for (int j = 0; j < i; j++) {
                    children[j].shutdownGracefully();
                }

                for (int j = 0; j < i; j++) {
                    EventExecutor e = children[j];
                    try {
                        while (!e.isTerminated()) {
                            e.awaitTermination(Integer.MAX_VALUE, TimeUnit.SECONDS);
                        }
                    } catch (InterruptedException interrupted) {
                        // Let the caller handle the interruption.
                        Thread.currentThread().interrupt();
                        break;
                    }
                }
            }
        }
    }

    /*
    创建选择器:简单轮询
        PowerOfTwoEventExecutorChooser:2的幂次方,位运算
        GenericEventExecutorChooser:否则,取余
    有事件/任务要执行时,取出一个EventExecutor
     */
    chooser = chooserFactory.newChooser(children);

    // 所有children停止时收到一个通知,优雅停机时用到
    final FutureListener<Object> terminationListener = new FutureListener<Object>() {
        @Override
        public void operationComplete(Future<Object> future) throws Exception {
            if (terminatedChildren.incrementAndGet() == children.length) {
                terminationFuture.setSuccess(null);
            }
        }
    };
    for (EventExecutor e : children) {
        e.terminationFuture().addListener(terminationListener);
    }

    // 返回一个只读的children,iterator()迭代时使用
    Set<EventExecutor> childrenSet = new LinkedHashSet<EventExecutor>(children.length);
    Collections.addAll(childrenSet, children);
    readonlyChildren = Collections.unmodifiableSet(childrenSet);
}
EventLoopGroup会管理EventLoop,EventLoop执行任务需要依赖Executor,Executor执行任务需要依赖ThreadFactory创建新的线程,我们看下Netty默认的Executor实现。
默认的ThreadFactory,会创建FastThreadLocalThread线程,来优化FastThreadLocal的性能,关于FastThreadLocal后面会有专门的文章介绍。
// 创建一个默认的线程工厂
protected ThreadFactory newDefaultThreadFactory() {
    return new DefaultThreadFactory(getClass());
}

/*
默认的线程工厂
 */
public class DefaultThreadFactory implements ThreadFactory {

    private static final AtomicInteger poolId = new AtomicInteger();

    // 生成线程名称时用到:prefix+nextId自增
    private final AtomicInteger nextId = new AtomicInteger();
    private final String prefix;//前缀
    private final boolean daemon;//是否守护线程,默认false
    private final int priority;//优先级 默认5
    protected final ThreadGroup threadGroup;//所属线程组

    // 省略部分代码......

    @Override
    public Thread newThread(Runnable r) {
        // 创建一个FastThreadLocalThread线程,优化FastThreadLocal的性能
        Thread t = newThread(FastThreadLocalRunnable.wrap(r), prefix + nextId.incrementAndGet());
        try {
            if (t.isDaemon() != daemon) {
                t.setDaemon(daemon);
            }

            if (t.getPriority() != priority) {
                t.setPriority(priority);
            }
        } catch (Exception ignored) {
            // Doesn't matter even if failed to set.
        }
        return t;
    }

    protected Thread newThread(Runnable r, String name) {
        return new FastThreadLocalThread(threadGroup, r, name);
    }
}
有了ThreadFactory,Executor的实现就很简单了,当要执行任务的时候,创建一个新线程去跑就好了。EventLoop会在第一次execute()时调用该方法,整个生命周期只会调用一次,即每个EventLoop只会创建一个线程,后续所有的任务,都是在run()方法里无限轮询去执行。
public final class ThreadPerTaskExecutor implements Executor {
    private final ThreadFactory threadFactory;

    public ThreadPerTaskExecutor(ThreadFactory threadFactory) {
        this.threadFactory = ObjectUtil.checkNotNull(threadFactory, "threadFactory");
    }

    /*
    执行任务时,利用ThreadFactory创建一个新线程去跑。
    EventLoop会在第一次execute()时调用该方法,整个生命周期只会调用一次,
    即每个EventLoop只会创建一个线程,后续所有的任务,都是在run()方法里无限轮询去执行。
     */
    @Override
    public void execute(Runnable command) {
        threadFactory.newThread(command).start();
    }
}
有了Executor,接下来就会调用newChild()进行children的初始化,对于NioEventLoopGroup来说,它管理的孩子是NioEventLoop,所以newChild()会创建NioEventLoop:
@Override
protected EventLoop newChild(Executor executor, Object... args) throws Exception {
    // EventLoop需要一个TaskQueue来存放待执行的任务,这里判断是否有指定QueueFactory,没有则使用默认的
    EventLoopTaskQueueFactory queueFactory = args.length == 4 ? (EventLoopTaskQueueFactory) args[3] : null;

    // 创建NioEventLoop
    return new NioEventLoop(this, executor, (SelectorProvider) args[0],
                            ((SelectStrategyFactory) args[1]).newSelectStrategy(), (RejectedExecutionHandler) args[2], queueFactory);
}
EventLoopGroup本身不干活,向它提交任务,它只会交给它的孩子EventLoop执行,所以它依赖一个EventExecutorChooser,当有任务来临时,从众多的孩子中挑选出一个,默认的选择策略就是简单轮询。
Netty这里做了一个小小的优化,如果孩子数量是2的幂次方数会使用位运算,否则取模。源码如下:
public final class DefaultEventExecutorChooserFactory implements EventExecutorChooserFactory {

    public static final DefaultEventExecutorChooserFactory INSTANCE = new DefaultEventExecutorChooserFactory();

    // 单例模式,通过INSTANCE提供一个单例对象
    private DefaultEventExecutorChooserFactory() { }

    /*
    创建一个选择器,从一组EventExecutor中挑选出一个。
    Netty默认的选择策略就是:简单轮询。
     */
    @Override
    public EventExecutorChooser newChooser(EventExecutor[] executors) {
        // 两种Chooser实现都有一个AtomicLong计数器,每次next()先自增再取余

        // 如果数量是2的幂次方数,则采用位运算
        if (isPowerOfTwo(executors.length)) {
            return new PowerOfTwoEventExecutorChooser(executors);
        } else {
            // 否则,对长度进行取余
            return new GenericEventExecutorChooser(executors);
        }
    }

    // 是否是2的幂次方数
    private static boolean isPowerOfTwo(int val) {
        return (val & -val) == val;
        /*
        二进制中,最高位是符号位,0正数、1负数。剩下的就是这个数的绝对值部分。
        原码:设置符号位,其他0填充
        反码:正数的反码与原码相同,负数的反码:除符号位外,其他位取反
        补码:正数的补码与原码相同,负数的补码:除符号位外,其他位取反,然后在最后一位加1(计算机使用补码)

        如下举例:
            5:00000000 00000000 00000000 00000101(原码)
            5:00000000 00000000 00000000 00000101(反码)
            5:00000000 00000000 00000000 00000101(补码)

           -5:10000000 00000000 00000000 00000101(原码)
           -5:11111111 11111111 11111111 11111010(反码)
           -5:11111111 11111111 11111111 11111011(补码)

           5 & -5 = 00000000 00000000 00000000 00000001 = 1 不是2的幂次方数
           8 & -8 = 00000000 00000000 00000000 00001000
                  & 11111111 11111111 11111111 11111000
                  = 00000000 00000000 00000000 00001000 = 8 是2的幂次方数
         */
    }

    // 2的幂次方数的选择器,位运算
    private static final class PowerOfTwoEventExecutorChooser implements EventExecutorChooser {
        private final AtomicInteger idx = new AtomicInteger();
        private final EventExecutor[] executors;

        PowerOfTwoEventExecutorChooser(EventExecutor[] executors) {
            this.executors = executors;
        }

        @Override
        public EventExecutor next() {
            // 计数器自增 & 长度-1,和HashMap一样
            return executors[idx.getAndIncrement() & executors.length - 1];
        }
    }

    // 普通的选择器,取余
    private static final class GenericEventExecutorChooser implements EventExecutorChooser {
        private final AtomicLong idx = new AtomicLong();
        private final EventExecutor[] executors;

        GenericEventExecutorChooser(EventExecutor[] executors) {
            this.executors = executors;
        }

        @Override
        public EventExecutor next() {
            return executors[(int) Math.abs(idx.getAndIncrement() % executors.length)];
        }
    }
}
有了选择器后,你向EventLoopGroup提交的任务,包括注册Channel,它都会轮询出一个EventLoop转交任务,源码如下:
@Override
public ChannelFuture register(Channel channel) {
    // 选出一个孩子,让它去执行
    return next().register(channel);
}
EventLoopGroup还有一个方法特别有用,那就是shutdownGracefully()优雅停机,调用后它会停止接受新的任务,并把队列中等待执行的任务(包括定时任务)处理完(Netty不保证100%处理完),然后释放资源。由于EventLoopGroup本身不干活,因此它依然停止所有的EventLoop,,源码如下:
public Future<?> shutdownGracefully(long quietPeriod, long timeout, TimeUnit unit) {
    for (EventExecutor l: children) {
        // 将孩子按个停机
        l.shutdownGracefully(quietPeriod, timeout, unit);
    }
    // 返回一个终止Future,停机后收到通知
    return terminationFuture();
}
NioEventLoopGroup差不多就这样,比较简单,它只是负责管理EventLoop,核心还是在EventLoop上。
NioEventLoopGroup在创建时,会根据线程数初始化NioEventLoop。NioEventLoop可以看作是一个单线程的线程池,也是真正干活的角色,它的继承关系如下:
NioEventLoop的主要职责是负责处理注册到其上的Channel的IO事件,除此之外它还可以执行用户提交的系统任务和定时任务,例如:你可以每隔一段时间检查一下连接是否断开,如果断开,客户端可以重连,服务端需要及时释放资源。
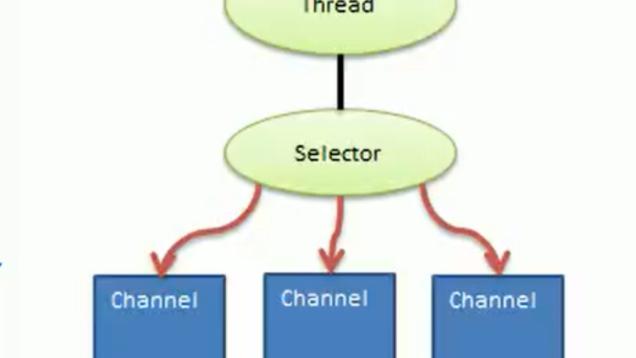
一个Channel只能被注册到一个EventLoop上,一个EventLoop可以注册多个Channel。一旦Channel注册到EventLoop,该EventLoop就要负责处理它整个生命周期的所有事件。事件以回调的方式被触发,所有的回调任务会被封装成一个Runnable放入taskQueue,由EventLoop线程串行化处理。虽然看似「串行化处理」效率低下,但是这避免了线程切换的开销和数据同步的问题,而且你可以开启多个EventLoop,并行处理,充分利用CPU资源。
先看属性,如下:
private static final int CLEANUP_INTERVAL = 256; // XXX Hard-coded value, but won't need customization.

// 是否禁用SelectionKey优化?默认为false
private static final boolean DISABLE_KEY_SET_OPTIMIZATION =
    SystemPropertyUtil.getBoolean("io.netty.noKeySetOptimization", false);

private static final int MIN_PREMATURE_SELECTOR_RETURNS = 3;

// Selector重建的阈值,默认512,目的是解决JDK Selector空轮询Bug
private static final int SELECTOR_AUTO_REBUILD_THRESHOLD;

// 当前有几个准备就绪的Channel?selectStrategy会用到,大于0代表有Channel事件需要处理
private final IntSupplier selectNowSupplier = new IntSupplier() {
    @Override
    public int get() throws Exception {
        return selectNow();
    }
};
再看构造函数,源码如下:
/**
 * 创建一个NioEventLoop实例,用来执行注册在其上的Channel事件
 * @param parent 所属Group
 * @param executor
 * @param selectorProvider 多路复用器提供者,不同平台会使用不同实现
 * @param strategy Selector.select()的策略
 * @param rejectedExecutionHandler 拒绝策略
 * @param queueFactory 任务队列工厂
 */
NioEventLoop(NioEventLoopGroup parent, Executor executor, SelectorProvider selectorProvider,
             SelectStrategy strategy, RejectedExecutionHandler rejectedExecutionHandler,
             EventLoopTaskQueueFactory queueFactory) {
    super(parent, executor, false, newTaskQueue(queueFactory), newTaskQueue(queueFactory),
            rejectedExecutionHandler);
    this.provider = ObjectUtil.checkNotNull(selectorProvider, "selectorProvider");
    this.selectStrategy = ObjectUtil.checkNotNull(strategy, "selectStrategy");
    /*
    每个EventLoop都会有一个Selector,用来监听注册在其上的Channel事件。
    对于BossGroup,处理的是Accept。
    对于WorkerGroup,处理的是read、write...
    SelectorTuple:Selector元组,Netty提供了一个Selector包装,用来优化select()性能
     */
    final SelectorTuple selectorTuple = openSelector();
    this.selector = selectorTuple.selector;
    this.unwrAppedSelector = selectorTuple.unwrappedSelector;
}
NioEventLoop首先创建了两个TaskQueue来存放待执行的任务,run()方法会不断消费任务。虽然可以多线程并发的往taskQueue中提交任务,但是由于EventLoop是单线程的,所有taskQueue的生产消费模型是:多生产者单消费者。针对这种消费场景,Netty实现了高性能的无锁队列「MpscQueue」,Queue的创建源码如下:
// 创建TaskQueue,存放待执行的任务
private static Queue<Runnable> newTaskQueue(
    EventLoopTaskQueueFactory queueFactory) {
    if (queueFactory == null) {
        // 默认创建Netty实现MpscQueue:Netty实现的高性能无锁队列,适用于多个生产者,单个消费者。
        return newTaskQueue0(DEFAULT_MAX_PENDING_TASKS);
    }
    return queueFactory.newTaskQueue(DEFAULT_MAX_PENDING_TASKS);
}

/*
根据最大队列数创建Queue。
MpscQueue:Netty实现的高性能无锁队列,适用于多个生产者,单个消费者。
多个线程可以并发往EventLoop提交任务,但是EventLoop本身是单线程消费的。
*/
private static Queue<Runnable> newTaskQueue0(int maxPendingTasks) {
    // This event loop never calls takeTask()
    return maxPendingTasks == Integer.MAX_VALUE ? PlatformDependent.<Runnable>newMpscQueue()
        : PlatformDependent.<Runnable>newMpscQueue(maxPendingTasks);
}
关于MpscQueue,后面会专门写文章介绍。
创建完taskQueue就是调用父类构造器进行相应的赋值操作了,这里略过,下面主要看openSelector()。
每个NioEventLoop被创建时,都会同时创建一个Selector多路复用器,这是JDK提供的,不熟悉的同学去看看JAVA Nio编程。EventLoopGroup会将Channel注册到NioEventLoop上,实际上就是注册到Selector上了。这样NioEventLoop就可以通过Selector来监听准备就绪的Channel,然后根据事件类型去触发相应的回调,所以Selector是NioEventLoop的核心。
openSelector()会做一个优化,将JDK的SelectorImpl的selectedKeys、publicSelectedKeys属性由HashSet替换成Netty的SelectedSelectionKeySet,内部是一个数组。当Selector监听到有准备就绪的Channel时,会往HashSet里添加SelectionKey,当SelectionKey比较多时,就容易发生哈希冲突,时间复杂度会增加,而SelectedSelectionKeySet内部使用数组来保存,避免了哈希冲突,性能会有一定的提升。
/*
打开一个Selector多路复用器
 */
private SelectorTuple openSelector() {
    final Selector unwrappedSelector;//未包装的原生Selector
    try {
        // 基于SelectorProvider打开一个原生的Selector,这是JDK提供的。
        unwrappedSelector = provider.openSelector();
    } catch (IOException e) {
        throw new ChannelException("failed to open a new selector", e);
    }

    // 如果禁用了SelectionKey优化,则unwrappedSelector和selector都指向原生Selector
    if (DISABLE_KEY_SET_OPTIMIZATION) {
        return new SelectorTuple(unwrappedSelector);
    }

    // 否则,使用SelectedSelectionKeySet来优化SelectionKey

    Object maybeSelectorImplClass = AccessController.doPrivileged(new PrivilegedAction<Object>() {
        @Override
        public Object run() {
            try {
                return Class.forName(
                        "sun.nio.ch.SelectorImpl",
                        false,
                        PlatformDependent.getSystemClassLoader());
            } catch (Throwable cause) {
                return cause;
            }
        }
    });

    if (!(maybeSelectorImplClass instanceof Class) ||
        // ensure the current selector implementation is what we can instrument.
        !((Class<?>) maybeSelectorImplClass).isAssignableFrom(unwrappedSelector.getClass())) {
        if (maybeSelectorImplClass instanceof Throwable) {
            Throwable t = (Throwable) maybeSelectorImplClass;
            logger.trace("failed to instrument a special java.util.Set into: {}", unwrappedSelector, t);
        }
        return new SelectorTuple(unwrappedSelector);
    }

    final Class<?> selectorImplClass = (Class<?>) maybeSelectorImplClass;
    final SelectedSelectionKeySet selectedKeySet = new SelectedSelectionKeySet();

    Object maybeException = AccessController.doPrivileged(new PrivilegedAction<Object>() {
        @Override
        public Object run() {
            try {
                // 反射获取SelectorImpl的selectedKeys、publicSelectedKeys属性
                Field selectedKeysField = selectorImplClass.getDeclaredField("selectedKeys");
                Field publicSelectedKeysField = selectorImplClass.getDeclaredField("publicSelectedKeys");

                if (PlatformDependent.javaVersion() >= 9 && PlatformDependent.hasUnsafe()) {
                    // Let us try to use sun.misc.Unsafe to replace the SelectionKeySet.
                    // This allows us to also do this in Java9+ without any extra flags.
                    long selectedKeysFieldOffset = PlatformDependent.objectFieldOffset(selectedKeysField);
                    long publicSelectedKeysFieldOffset =
                            PlatformDependent.objectFieldOffset(publicSelectedKeysField);

                    if (selectedKeysFieldOffset != -1 && publicSelectedKeysFieldOffset != -1) {
                        PlatformDependent.putObject(
                                unwrappedSelector, selectedKeysFieldOffset, selectedKeySet);
                        PlatformDependent.putObject(
                                unwrappedSelector, publicSelectedKeysFieldOffset, selectedKeySet);
                        return null;
                    }
                    // We could not retrieve the offset, lets try reflection as last-resort.
                }

                Throwable cause = ReflectionUtil.trySetAccessible(selectedKeysField, true);
                if (cause != null) {
                    return cause;
                }
                cause = ReflectionUtil.trySetAccessible(publicSelectedKeysField, true);
                if (cause != null) {
                    return cause;
                }

                /*
                通过反射将SelectorImpl的selectedKeys、publicSelectedKeys替换为selectedKeySet来提升性能。
                 */
                selectedKeysField.set(unwrappedSelector, selectedKeySet);
                publicSelectedKeysField.set(unwrappedSelector, selectedKeySet);
                return null;
            } catch (NoSuchFieldException e) {
                return e;
            } catch (IllegalAccessException e) {
                return e;
            }
        }
    });

    if (maybeException instanceof Exception) {
        selectedKeys = null;
        Exception e = (Exception) maybeException;
        logger.trace("failed to instrument a special java.util.Set into: {}", unwrappedSelector, e);
        return new SelectorTuple(unwrappedSelector);
    }
    selectedKeys = selectedKeySet;
    logger.trace("instrumented a special java.util.Set into: {}", unwrappedSelector);
    // 创建一个SelectorTuple,包含一个原生的Selector,和优化过的Selector。
    return new SelectorTuple(unwrappedSelector,
                             new SelectedSelectionKeySetSelector(unwrappedSelector, selectedKeySet));
}
SelectedSelectionKeySet部分源码如下:
/**
 * Selector的 Set<SelectionKey> selectedKeys
 * 默认用HashSet存储,当有Channel准备就绪时,会添加到HashSet中,但如果发生冲突,HashSet的时间复杂度是O(n)链表/O(log n)红黑树
 * Netty通过反射将selectedKeys、publicSelectedKeys替换成SelectedSelectionKeySet
 * 使用数组来避免哈希冲突
 */
final class SelectedSelectionKeySet extends AbstractSet<SelectionKey> {
    // 使用数组来保存,默认长度1024
    SelectionKey[] keys;
    int size;//keys大小

    SelectedSelectionKeySet() {
        keys = new SelectionKey[1024];
    }
    // 省略部分代码.......
}
创建完Selector,NioEventLoop的初始化就完成了,但此时线程并未启动,Netty这里做了懒加载处理,只有当EventLoop第一次被调用execute()执行任务时才会通过executor去创建线程跑run()方法。
用户不主动提交任务的前提下,对于BossGroup的EventLoop来说,线程是在调用bind()方法将ServerSocketChannel注册到EventLoop时被启动的。对于WorkerGroup的EventLoop来说,线程是在BossGroup接收到客户端连接时,将SocketChannel注册到WorkerGroup时被启动的。
不管是ServerSocketChannel.bind()还是接收到客户端连接,都是要将Channel注册到EventLoop,再由EventLoop去轮询处理事件。register()源码如下:
// 注册Channel
@Override
public ChannelFuture register(Channel channel) {
    // 创建一个DefaultChannelPromise,再注册,目的是让用户可以在注册完成时收到通知
    return register(new DefaultChannelPromise(channel, this));
}

@Override
public ChannelFuture register(final ChannelPromise promise) {
    ObjectUtil.checkNotNull(promise, "promise");
    // 转交给Channel.Unsafe完成
    promise.channel().unsafe().register(this, promise);
    return promise;
}
这里需要说下Channel.Unsafe接口,对于bind()、write()、read()等这类方法,由于需要和底层API交互,Netty对开发者屏蔽了底层实现,不希望由开发者调用这类方法,于是将它们封装到Channel.Unsafe中,从名字中也能看出来,这些操作是不安全的,开发者尽量不要去自己调用。
register()操作的目的其实就是将JDK的SocketChannel注册到Selector多路复用器上,由于需要和底层API交互,于是转交给Channel.Unsafe处理,源码在
io.netty.channel.AbstractChannel.AbstractUnsafe#register(),如下所示:
/*
将Channel注册到EventLoop,其实就是调用JDK底层的:SocketChannel.register(selector)。
将Channel注册到多路复用器。
 */
@Override
public final void register(EventLoop eventLoop, final ChannelPromise promise) {
    ObjectUtil.checkNotNull(eventLoop, "eventLoop");
    // 重复注册校验
    if (isRegistered()) {
        promise.setFailure(new IllegalStateException("registered to an event loop already"));
        return;
    }
    // 检查是否兼容,Channel和EventLoop模式不能混用,例如Oio和Nio不兼容
    if (!isCompatible(eventLoop)) {
        promise.setFailure(
                new IllegalStateException("incompatible event loop type: " + eventLoop.getClass().getName()));
        return;
    }

    AbstractChannel.this.eventLoop = eventLoop;
    /*
    当前线程是否是EventLoop线程?
    如果是就直接执行,否则提交一个任务,后面串行化执行。
     */
    if (eventLoop.inEventLoop()) {
        register0(promise);
    } else {
        try {
            eventLoop.execute(new Runnable() {
                @Override
                public void run() {
                    register0(promise);
                }
            });
        } catch (Throwable t) {
            logger.warn(
                    "Force-closing a channel whose registration task was not accepted by an event loop: {}",
                    AbstractChannel.this, t);
            closeForcibly();
            closeFuture.setClosed();
            safeSetFailure(promise, t);
        }
    }
}
register()做了一些检查,然后确保由EventLoop来执行注册操作,前面说过了,EventLoop会负责处理Channel的所有事件。register0()完成注册,并触发相应的事件回调,通过Pipeline传播出去。
private void register0(ChannelPromise promise) {
    try {
        // 确保Channel是打开状态
        if (!promise.setUncancellable() || !ensureOpen(promise)) {
            return;
        }
        boolean firstRegistration = neverRegistered;
        // JDK原生channel.register(selector)
        doRegister();
        neverRegistered = false;
        registered = true;

        // 触发 ChannelHandler.handlerAdded()回调
        pipeline.invokeHandlerAddedIfNeeded();

        // 通知promise操作成功了,触发回调
        safeSetSuccess(promise);

        // 注册完成,触发ChannelRegistered回调,通过pipeline传播出去
        pipeline.fireChannelRegistered();

        // 如果连接激活了,则触发active事件,只在首次注册时会触发
        if (isActive()) {
            if (firstRegistration) {
                // 触发ChannelRegistered回调,通过pipeline传播出去
                pipeline.fireChannelActive();
            } else if (config().isAutoRead()) {
                beginRead();
            }
        }
    } catch (Throwable t) {
        // 异常了,关闭资源,触发失败通知
        closeForcibly();
        closeFuture.setClosed();
        safeSetFailure(promise, t);
    }
}
doRegister()会调用JDK底层的注册,源码如下:
// 真正调用JDK底层API完成注册
@Override
protected void doRegister() throws Exception {
    boolean selected = false;
    for (;;) {
        try {
            // 获取Java原生SocketChannel注册到未包装的原生Selector上
            selectionKey = javaChannel().register(eventLoop().unwrappedSelector(), 0, this);
            return;
        } catch (CancelledKeyException e) {
            if (!selected) {
                eventLoop().selectNow();
                selected = true;
            } else {
                throw e;
            }
        }
    }
}
完成SocketChannel的注册后,EventLoop就可以通过轮询Selector来监听准备就绪的Channel了,后面就是一系列的事件处理了。
在调用
io.netty.channel.AbstractChannel.AbstractUnsafe#register()时,EventLoop线程已经启动并执行run()方法,在run()方法里,EventLoop线程会执行一个死循环,直到线程被停止。
在死循环里,EventLoop线程会不断轮询Selector是否有准备就绪的Channel需要处理?taskQueue是否有任务在等待执行?scheduledTaskQueue是否有定时任务需要执行?NioEventLoop.run()是任务处理的关键。
@Override
protected void run() {
    /*
    无效空轮询的次数
    JDK的Selector存在Bug,会导致空轮询,CPU飙升。
    Netty会检测Selector.select()空轮询次数,超过SELECTOR_AUTO_REBUILD_THRESHOLD则重建Selector。
    有效轮询:要么有IO事件到达、要么执行了Task。
     */
    int selectCnt = 0;
    for (;;) {
        try {
            int strategy;
            try {
                /*
                NioEventLoop的执行策略:
                有任务待执行吗?
                    没有:Selector.select()阻塞,等待IO事件到达(定时任务判断)
                    有:非阻塞调用Selector.selectNow(),
                 */
                strategy = selectStrategy.calculateStrategy(selectNowSupplier, hasTasks());
                switch (strategy) {
                case SelectStrategy.CONTINUE:// 重试IO循环
                    continue;

                case SelectStrategy.BUSY_WAIT:// NIO不支持忙等,走SELECT

                case SelectStrategy.SELECT: // 队列中没有任务要执行
                    // 下一个要执行的定时任务截止时间
                    long curDeadlineNanos = nextScheduledTaskDeadlineNanos();
                    if (curDeadlineNanos == -1L) {
                        curDeadlineNanos = NONE;//没有定时任务
                    }
                    nextWakeupNanos.set(curDeadlineNanos);
                    try {
                        /*
                        如果没有任务要执行,则在下一个任务要执行前,阻塞等待IO事件。
                        没有定时任务,则等待超时为Long.MAX_VALUE,无限等待
                         */
                        if (!hasTasks()) {
                            strategy = select(curDeadlineNanos);
                        }
                    } finally {
                        // This update is just to help block unnecessary selector wakeups
                        // so use of lazySet is ok (no race condition)
                        nextWakeupNanos.lazySet(AWAKE);
                    }
                    // fall through
                default:
                }
            } catch (IOException e) {
                // If we receive an IOException here its because the Selector is messed up. Let's rebuild
                // the selector and retry. https://github.com/netty/netty/issues/8566
                rebuildSelector0();
                selectCnt = 0;
                handleLoopException(e);
                continue;
            }

            selectCnt++;//无效轮询次数+1,后面会判断是否重置
            cancelledKeys = 0;
            needsToSelectAgain = false;
            final int ioRatio = this.ioRatio;
            boolean ranTasks;
            if (ioRatio == 100) {
                // 优先处理所有的IO事件后再去处理Task
                try {
                    if (strategy > 0) {// 代表有准备就绪的Channel待处理
                        processSelectedKeys();
                    }
                } finally {
                    // 处理完IO事件后,执行所有Task
                    ranTasks = runAllTasks();
                }
            } else if (strategy > 0) {
                // 先处理IO事件,并记录所花的时间
                final long ioStartTime = System.nanoTime();
                try {
                    processSelectedKeys();
                } finally {
                    // 根据ioTime和ioRatio,计算处理Task能分配的时间
                    final long ioTime = System.nanoTime() - ioStartTime;
                    ranTasks = runAllTasks(ioTime * (100 - ioRatio) / ioRatio);
                }
            } else {
                /*
                有待执行的任务,且Selector.selectNow()返回0,没有IO事件需要处理,那就先执行少量的Task。
                每64个任务检查一次超时,如果有足够的任务,那么最少执行64个。
                所以,不应该提交耗时任务,阻塞IO线程!!!
                 */
                ranTasks = runAllTasks(0); // This will run the minimum number of tasks
            }

            if (ranTasks || strategy > 0) {
                // 如果执行了任务或者有IO事件,说明这次轮询是有效的,重置selectCnt
                if (selectCnt > MIN_PREMATURE_SELECTOR_RETURNS && logger.isDebugEnabled()) {
                    logger.debug("Selector.select() returned prematurely {} times in a row for Selector {}.",
                            selectCnt - 1, selector);
                }
                selectCnt = 0;
            } else if (unexpectedSelectorWakeup(selectCnt)) { // 意外唤醒时,是否需要重置selectCnt,解决Selector空轮询Bug
                selectCnt = 0;
            }
        } catch (CancelledKeyException e) {
            // Harmless exception - log anyway
            if (logger.isDebugEnabled()) {
                logger.debug(CancelledKeyException.class.getSimpleName() + " raised by a Selector {} - JDK bug?",
                        selector, e);
            }
        } catch (Error e) {
            throw (Error) e;
        } catch (Throwable t) {
            handleLoopException(t);
        } finally {
            // 不管正常/异常停止,都要关闭,释放资源。
            try {
                if (isShuttingDown()) {
                    closeAll();
                    if (confirmShutdown()) {
                        return;
                    }
                }
            } catch (Error e) {
                throw (Error) e;
            } catch (Throwable t) {
                handleLoopException(t);
            }
        }
    }
}
SelectStrategy是一个选择策略,其实就是告诉EventLoop线程需要做什么事。
NioEventLoop在没有Channel事件,又没有taskQueue任务时,会调用
nextScheduledTaskDeadlineNanos()计算距离下一次要执行的定时任务还有多长时间,在这之前,它会调用Selector.select(curDeadlineNanos)阻塞等待Channel事件(5微妙内不会阻塞),源码如下:
// 在下一个定时任务要执行前,等待IO事件
private int select(long deadlineNanos) throws IOException {
    if (deadlineNanos == NONE) {
        // 没有定时任务,直接阻塞
        return selector.select();
    }
    // 如果截止时间在5微秒内,超时将为0
    long timeoutMillis = deadlineToDelayNanos(deadlineNanos + 995000L) / 1000000L;
    return timeoutMillis <= 0 ? selector.selectNow() : selector.select(timeoutMillis);
}
被唤醒,要么是因为有Channel事件了,要么是超时了需要执行定时任务了,开始走下面的逻辑。
ioRatio代表EventLoop执行IO事件和Task的时间比例,100代表优先执行完所有的IO事件再执行系统任务,否则会根据这个比例去调整执行Task所消耗的时间。
processSelectedKeys()会挨个处理准备就绪的Channel事件,前面说过,Netty默认会使用数组代替HashSet优化SelectionKey,这里会进行判断:
/*
处理SelectionKey,分为优化后的处理,和普通处理
优化:HashSet<SelectionKey>  --> SelectionKey[]
 */
private void processSelectedKeys() {
    if (selectedKeys != null) {
        // 说明Netty将HashSet优化为数组了,可以高效处理
        processSelectedKeysOptimized();
    } else {
        // 没优化过,普通处理
        processSelectedKeysPlain(selector.selectedKeys());
    }
}
不论如何,最终都会遍历selectedKeys,挨个处理,源码如下:
// 处理SelectionKey事件
private void processSelectedKey(SelectionKey k, AbstractNioChannel ch) {
    final AbstractNioChannel.NioUnsafe unsafe = ch.unsafe();
    if (!k.isValid()) {//有效性检查,Channel、Selector可能已经被关闭
        final EventLoop eventLoop;
        try {
            eventLoop = ch.eventLoop();
        } catch (Throwable ignored) {
            return;
        }
        if (eventLoop == this) {
            unsafe.close(unsafe.voidPromise());
        }
        return;
    }

    try {
        // 准备就绪的事件标志位
        int readyOps = k.readyOps();
        if ((readyOps & SelectionKey.OP_CONNECT) != 0) {
            int ops = k.interestOps();
            ops &= ~SelectionKey.OP_CONNECT;
            k.interestOps(ops);
            // 连接就绪
            unsafe.finishConnect();
        }

        if ((readyOps & SelectionKey.OP_WRITE) != 0) {
            // 数据可写
            ch.unsafe().forceFlush();
        }

        // 数据可读、有新的连接接入
        if ((readyOps & (SelectionKey.OP_READ | SelectionKey.OP_ACCEPT)) != 0 || readyOps == 0) {
            // 对于ServerSocketChannel只关心OP_ACCEPT事件
            unsafe.read();
        }
    } catch (CancelledKeyException ignored) {
        unsafe.close(unsafe.voidPromise());
    }
}
针对不同的就绪事件,会调用Channel.Unsafe对应的方法。
对于OP_CONNECT事件,会调用unsafe.finishConnect()方法,它主要就是判断连接是否激活,如果激活则触发ChannelActive回调,并通过Pipeline传播出去。
对于OP_WRITE事件,会调用ch.unsafe().forceFlush()方法,这里的ch是指客户端Channel,它会将ChannelOutboundBuffer缓冲的数据转换成JDK的ByteBuffer并调用底层API通过SocketChannel响应给客户端。
对于OP_ACCEPT事件,ServerSocketChannel会调用
io.netty.channel.nio.AbstractNioMessageChannel.NioMessageUnsafe#read()方法来接收客户端连接:
/*
NioEventLoop.processSelectedKey() 当Channel有 OP_READ | OP_ACCEPT 事件时调用该方法。
对于服务端Channel来说,就是 OP_ACCEPT.
 */
@Override
public void read() {
    assert eventLoop().inEventLoop();
    final ChannelConfig config = config();
    final ChannelPipeline pipeline = pipeline();
    // 接收对端数据时,ByteBuf的分配策略,基于历史数据动态调整初始化大小,避免太大浪费空间,太小又会频繁扩容
    final RecvByteBufAllocator.Handle allocHandle = unsafe().recvBufAllocHandle();
    allocHandle.reset(config);

    boolean closed = false;
    Throwable exception = null;
    try {
        try {
            do {
                /*
                对于ServerSocketChannel来说,就是接收一个客户端Channel,添加到readBuf
                 */
                int localRead = doReadMessages(readBuf);
                if (localRead == 0) {
                    break;
                }
                if (localRead < 0) {
                    closed = true;
                    break;
                }
                // 递增已读取的消息数量
                allocHandle.incMessagesRead(localRead);
            } while (continueReading(allocHandle));
        } catch (Throwable t) {
            exception = t;
        }

        int size = readBuf.size();
        for (int i = 0; i < size; i ++) {
            readPending = false;
            // 通过pipeline传播ChannelRead事件
            pipeline.fireChannelRead(readBuf.get(i));
        }
        readBuf.clear();
        // 读取完毕的回调,有的Handle会根据本次读取的总字节数,自适应调整下次应该分配的缓冲区大小
        allocHandle.readComplete();
        // 通过pipeline传播ChannelReadComplete事件
        pipeline.fireChannelReadComplete();

        if (exception != null) {// 事件处理异常了
            // 是否需要关闭连接
            closed = closeonReadError(exception);

            // 通过pipeline传播异常事件
            pipeline.fireExceptionCaught(exception);
        }

        if (closed) {//如果需要关闭,那就关闭
            inputShutdown = true;
            if (isOpen()) {
                close(voidPromise());
            }
        }
    } finally {
        if (!readPending && !config.isAutoRead()) {
            removeReadOp();
        }
    }
}
主要是看doReadMessages()方法,Netty会调用accept()获取到一个JDK原生SocketChannel,并把它包装成Netty的NioSocketChannel:
/*
对于服务端Channel来说,处理 OP_ACCEPT 事件就是从Channel中接收一个客户端Channel。
 */
@Override
protected int doReadMessages(List<Object> buf) throws Exception {
    // 获取客户端Channel,调用的就是JDK原生方法:serverSocketChannel.accept()
    SocketChannel ch = SocketUtils.accept(javaChannel());
    try {
        if (ch != null) {
            // 将原生SocketChannel包装成Netty的NioSocketChannel
            buf.add(new NioSocketChannel(this, ch));
            return 1;
        }
    } catch (Throwable t) {
        logger.warn("Failed to create a new channel from an accepted socket.", t);
        try {
            ch.close();
        } catch (Throwable t2) {
            logger.warn("Failed to close a socket.", t2);
        }
    }
    return 0;
}
接收到客户端的连接,并把它封装成NioSocketChannel,随后会触发channelRead回调,在
ServerBootstrapAcceptor.ServerBootstrapAcceptor中,会把客户端Channel注册到WorkerGroup中,由WorkerGroup去完成后续的IO读写事件,BossGroup只负责连接的建立,这就是经典的Reactor线程模型。
同样对于OP_ACCEPT事件,SocketChannel会调用
io.netty.channel.nio.AbstractNioByteChannel.NioByteUnsafe#read()来接收对端发送的数据:
/*
客户端发送数据时触发。
见 io.netty.channel.nio.NioEventLoop.processSelectedKey
 */
@Override
public final void read() {
    final ChannelConfig config = config();
    if (shouldBreakReadReady(config)) {
        clearReadPending();
        return;
    }
    final ChannelPipeline pipeline = pipeline();
    final ByteBufAllocator allocator = config.getAllocator();
    final RecvByteBufAllocator.Handle allocHandle = recvBufAllocHandle();
    allocHandle.reset(config);

    ByteBuf byteBuf = null;
    boolean close = false;
    try {
        do {
            // 分配一个ByteBuf,大小能容纳可读数据,又不过于浪费空间。
            byteBuf = allocHandle.allocate(allocator);
            /*
            doReadBytes(byteBuf):ByteBuf内部有ByteBuffer,底层还是调用了SocketChannel.read(ByteBuffer)
            allocHandle.lastBytesRead()根据读取到的实际字节数,自适应调整下次分配的缓冲区大小。
             */
            allocHandle.lastBytesRead(doReadBytes(byteBuf));
            if (allocHandle.lastBytesRead() <= 0) {
                // 没数据可读了.
                byteBuf.release();
                byteBuf = null;
                close = allocHandle.lastBytesRead() < 0;
                if (close) {
                    // There is nothing left to read as we received an EOF.
                    readPending = false;
                }
                break;
            }

            // 递增已经读取的消息数量
            allocHandle.incMessagesRead(1);
            readPending = false;
            // 通过pipeline传播ChannelRead事件
            pipeline.fireChannelRead(byteBuf);
            byteBuf = null;
        } while (allocHandle.continueReading());//判断是否需要继续读

        // 读取完毕,pipeline传播ChannelReadComplete事件
        allocHandle.readComplete();
        pipeline.fireChannelReadComplete();

        if (close) {
            closeOnRead(pipeline);
        }
    } catch (Throwable t) {
        handleReadException(pipeline, byteBuf, t, close, allocHandle);
    } finally {
        if (!readPending && !config.isAutoRead()) {
            removeReadOp();
        }
    }
}
}
大体逻辑和ServerSocketChannel类似,只是接收到的数据不再是SocketChannel,而是ByteBuf。底层还是调用了JDK原生的SocketChannel.read(ByteBuffer),再将ByteBuffer转换成Netty的ByteBuf。
数据接收到后,继续通过Pipeline传播ChannelRead和ChannelReadComplete回调。
到这里,基本就把EventLoop说的差不多了,整体工作流程已经了解了。细节的地方如:ByteBuf是如何动态分配的,ByteBuf是如何写出到SocketChannel的等等,这些后面专门写文章讲吧,不然这篇文章太长了。
前面分别讲了NioEventLoopGroup和NioEventLoop单独的工作流程,还没有把整个完整的流程给串起来。作为服务端启动的引导类,ServerBootstrap是服务端整个启动流程的入口,核心方法 bind() 会调用initAndRegister()创建一个ServerSocketChannel,并把它注册到BossGroup的EventLoop的 Selector 上,这样BossGroup就可以处理连接事件了。但此时是不会有连接事件的,因为还没有绑定到本地端口,客户端无法建立连接。
注册完后,ServerBootstrap随后会调用doBind0()将ServerSocketChannel绑定到本地端口,至此服务端启动完成,耐心等待Channel事件即可。
/*
创建一个ServerSocketChannel,并绑定到本地端口
 */
public ChannelFuture bind(SocketAddress localAddress) {
    // 数据验证,group/channelFactory不能为null
    validate();
    return doBind(ObjectUtil.checkNotNull(localAddress, "localAddress"));
}

private ChannelFuture doBind(final SocketAddress localAddress) {
    /*
    1.反射创建ServerSocketChannel
    2.ServerSocketChannel的初始化,创建Pipeline、设置Options、Attrs。
    3.将ServerSocketChannel注册到EventLoop
    此时,EventLoop可以开始轮询Accept事件了,但是由于还未bind本地端口,所以不会有事件发生。
     */
    final ChannelFuture regFuture = initAndRegister();

    final Channel channel = regFuture.channel();
    if (regFuture.cause() != null) {
        // 如果异常了,直接返回
        return regFuture;
    }

    if (regFuture.isDone()) {
        // Register成功了,则开始绑定端口
        ChannelPromise promise = channel.newPromise();
        /*
        将Channel绑定到本地端口,底层还是调用了JDK原生的channel.bind()。
        由于bind()是一个出站事件,需要通过Pipeline传播,所以会转交给Pipeline执行:pipeline.bind(localAddress, promise)。
        最终会传播到DefaultChannelPipeline的HeadContext.bind(),它又会转交给Channel.Unsafe.bind()。
        Channel.Unsafe.bind()最终会调用JDK原生的javaChannel().bind(),详见:io.netty.channel.socket.nio.NioServerSocketChannel.doBind()
        绑定成功后,会触发promise的回调
         */
        doBind0(regFuture, channel, localAddress, promise);
        return promise;
    } else {
        // 因为是异步的,防止Register还没完成,通过注册回调来绑定。
        final PendingRegistrationPromise promise = new PendingRegistrationPromise(channel);
        regFuture.addListener(new ChannelFutureListener() {
            @Override
            public void operationComplete(ChannelFuture future) throws Exception {
                Throwable cause = future.cause();
                if (cause != null) {
                    promise.setFailure(cause);
                } else {
                    promise.registered();
                    doBind0(regFuture, channel, localAddress, promise);
                }
            }
        });
        return promise;
    }
}
先看initAndRegister(),初始化ServerSocketChannel并注册到BossGroup:
// 初始化和注册
final ChannelFuture initAndRegister() {
    Channel channel = null;
    try {
        /*
        channelFactory根据Channel.class反射创建实例
            服务端:ServerSocketChannel
            客户端:SocketChannel
         */
        channel = channelFactory.newChannel();

        /*
        初始化Channel:服务端和客户端
            1.设置ChannelPipeline
            2.设置options
            3.设置attrs
         */
        init(channel);
    } catch (Throwable t) {
        if (channel != null) {
            channel.unsafe().closeForcibly();
            return new DefaultChannelPromise(channel, GlobalEventExecutor.INSTANCE).setFailure(t);
        }
        return new DefaultChannelPromise(new FailedChannel(), GlobalEventExecutor.INSTANCE).setFailure(t);
    }

    // 将Channel注册到EventLoop,从Group中轮询出一个EventLoop
    ChannelFuture regFuture = config().group().register(channel);
    if (regFuture.cause() != null) {
        if (channel.isRegistered()) {
            channel.close();
        } else {
            channel.unsafe().closeForcibly();
        }
    }
    return regFuture;
}
init()会初始化Channel,分为服务端和客户端两种。客户端Channel初始化很简单,就是设置Pipeline、Options、Attrs,这里就不贴代码了。服务端复杂一些,除了设置自身的Pipeline、Options、Attrs,还要负责初始化客户端接入的Channel,并把它注册到WorkerGroup:
// 服务端Channel初始化
@Override
void init(Channel channel) {// 这里的channel是ServerSocketChannel
    // 设置options
    setChannelOptions(channel, newOptionsArray(), logger);
    // 设置attrs
    setAttributes(channel, newAttributesArray());

    // 初始化ServerSocketChannel的ChannelPipeline
    ChannelPipeline p = channel.pipeline();

    final EventLoopGroup currentChildGroup = childGroup;
    final ChannelHandler currentChildHandler = childHandler;
    // 和ServerSocketChannel建立连接的客户端SocketChannel需要设置的options和attrs
    final Entry<ChannelOption<?>, Object>[] currentChildOptions = newOptionsArray(childOptions);
    final Entry<AttributeKey<?>, Object>[] currentChildAttrs = newAttributesArray(childAttrs);

    /*
    往服务端Channel添加Handler:
        1.封装HandlerAdded回调任务,保存在PendingHandlerCallback
        2.后续的register()操作会触发回调:pipeline.invokeHandlerAddedIfNeeded();
     */
    p.addLast(new ChannelInitializer<Channel>() {
        /*
        initChannel()何时被调用?
            ChannelHandler被添加到Pipeline有一个对应的回调:handlerAdded()
            addLast()会提交一个任务,让EventLoop来触发这个回调
            ChannelInitializer在handlerAdded()回调里会执行该初始化方法。
         */
        @Override
        public void initChannel(final Channel ch) {
            final ChannelPipeline pipeline = ch.pipeline();
            ChannelHandler handler = config.handler();//ServerBootstrap.handler()设置的
            if (handler != null) {
                pipeline.addLast(handler);
            }

            ch.eventLoop().execute(new Runnable() {
                @Override
                public void run() {
                    // ServerBootstrapAcceptor是服务端接收客户端连接的核心
                    pipeline.addLast(new ServerBootstrapAcceptor(
                            ch, currentChildGroup, currentChildHandler, currentChildOptions, currentChildAttrs));
                }
            });
        }
    });
}
服务端Channel在初始化Pipeline的时候会添加一个ServerBootstrapAcceptor,它是服务端接收客户端连接的核心。
先看属性,它保留了客户端连接时创建Channel的必要信息:
private final EventLoopGroup childGroup;// Reactor模型中的WorkerGroup
private final ChannelHandler childHandler;// 客户端Channel的ChannelHandler
private final Entry<ChannelOption<?>, Object>[] childOptions;// 客户端Channel的Options
private final Entry<AttributeKey<?>, Object>[] childAttrs;// 客户端Channel的Attrs
private final Runnable enableAutoReadTask; // 启用自动读取的任务
构造函数就不贴代码了,都是属性赋值操作。
需要重点关注的方法是channelRead(),前面已经分析过了,BossGroup监听到有客户端接入时会触发该回调:
/*
有客户端连接时,触发.
见 io.netty.channel.nio.AbstractNioMessageChannel.NioMessageUnsafe.read()
 */
@Override
@SuppressWarnings("unchecked")
public void channelRead(ChannelHandlerContext ctx, Object msg) {
    final Channel child = (Channel) msg;// 这里的Channel是SocketChannel

    // 设置客户端Channel的Pipeline、Options、Attrs
    child.pipeline().addLast(childHandler);
    setChannelOptions(child, childOptions, logger);
    setAttributes(child, childAttrs);

    try {
        /*
        将客户端Channel注册到WorkerGroup:
            1.next()轮询出一个EventLoop.register()
            2.Channel.Unsafe.register(),Channel注册到Selector
            3.触发各种回调
        Channel一旦注册到EventLoop,就由该EventLoop负责处理它整个生命周期的所有事件。
         */
        childGroup.register(child).addListener(new ChannelFutureListener() {
            @Override
            public void operationComplete(ChannelFuture future) throws Exception {
                // 如果注册失败,强制关闭连接
                if (!future.isSuccess()) {
                    // 底层就是调用原生JDK的关闭方法:javaChannel().close();
                    forceClose(child, future.cause());
                }
            }
        });
    } catch (Throwable t) {
        forceClose(child, t);
    }
}
这里处理的是客户端的接入,设置Options、Attrs、Pipeline,并注册到WorkerGroup,后续的所有读写事件交给WorkerGroup处理。
在doBind0()没调用之前,所有的这一切都不会发生,所以最后只要看一下Netty是如何将ServerSocketChannel绑定到本地端口的,整个流程就全部分析结束了。
private static void doBind0(
    final ChannelFuture regFuture, final Channel channel,
    final SocketAddress localAddress, final ChannelPromise promise) {

    // 往Channel绑定的EventLoop提交一个绑定任务,转交给Channel去执行
   	channel.eventLoop().execute(new Runnable() {
        @Override
        public void run() {
            if (regFuture.isSuccess()) {
                channel.bind(localAddress, promise).addListener(ChannelFutureListener.CLOSE_ON_FAILURE);
            } else {
                promise.setFailure(regFuture.cause());
            }
        }
    });
}
由于bind()是一个出站事件,所以会转交给Pipeline执行,需要它把事件传播出去。
@Override
public ChannelFuture bind(SocketAddress localAddress, ChannelPromise promise) {
    return pipeline.bind(localAddress, promise);
}
Pipeline会从TailContext开始传播,TailContext会往后寻找能处理bind事件的ChannelHandler:
@Override
public ChannelFuture bind(final SocketAddress localAddress, final ChannelPromise promise) {
    ObjectUtil.checkNotNull(localAddress, "localAddress");
    if (isNotValidPromise(promise, false)) {
        // cancelled
        return promise;
    }

    /*
    TailContext会往后寻找能处理bind事件的ChannelHandler。
    因为是出站事件,所以调用findContextOutbound()
     */
    final AbstractChannelHandlerContext next = findContextOutbound(MASK_BIND);
    EventExecutor executor = next.executor();
    if (executor.inEventLoop()) {// 让EventLoop线程串行化处理
        next.invokeBind(localAddress, promise);
    } else {
        safeExecute(executor, new Runnable() {
            @Override
            public void run() {
                next.invokeBind(localAddress, promise);
            }
        }, promise, null, false);
    }
    return promise;
}
如果用户没有重写bind()回调的话,TailContext会把事件传播给HeadContext,由于bind操作需要和底层API交互,HeadContext会将操作转交给Channel.Unsafe执行,所以最终会调用
io.netty.channel.AbstractChannel.AbstractUnsafe#bind(),源码如下:
/*
将ServerSocketChannel绑定到本地端口,如何被触发的?
1.Bootstrap.bind()会往Channel注册的EventLoop提交一个任务:Channel.bind()
2.由于bind()是一个出站事件,需要被Pipeline传播出去,于是会被转交给Pipeline执行:Pipeline.bind()
3.bind()事件从TailContext开始传播,不出意外会传播到HeadContext。
4.HeadContext会再将bind()任务转交给Channel.Unsafe执行,于是被触发。
总结:Channel.bind()会将事件通过Pipeline进行传播,从TailContext到HeadContext。
 */
@Override
public final void bind(final SocketAddress localAddress, final ChannelPromise promise) {
    assertEventLoop();//确保是EventLoop线程执行

    // promise标记为不可取消 确保Channel是Open状态,如果close了就无法bind了
    if (!promise.setUncancellable() || !ensureOpen(promise)) {
        return;
    }

    if (Boolean.TRUE.equals(config().getOption(ChannelOption.SO_BROADCAST)) &&
        localAddress instanceof InetSocketAddress &&
        !((InetSocketAddress) localAddress).getAddress().isAnyLocalAddress() &&
        !PlatformDependent.iswindows() && !PlatformDependent.maybeSuperUser()) {
        logger.warn(
                "A non-root user can't receive a broadcast packet if the socket " +
                "is not bound to a wildcard address; binding to a non-wildcard " +
                "address (" + localAddress + ") anyway as requested.");
    }

    boolean wasActive = isActive();//连接是否活跃
    try {
        /*
        真正的绑定操作,子类实现。
        看NioServerSocketChannel实现,就是调用了JDK原生的javaChannel().bind();
         */
        doBind(localAddress);
    } catch (Throwable t) {
        safeSetFailure(promise, t);
        closeIfClosed();
        return;
    }

    if (!wasActive && isActive()) {
        // 连接处于活跃状态,触发Active回调,往EventLoop提交一个任务,通过Pipeline传播出去。
        invokeLater(new Runnable() {
            @Override
            public void run() {
                pipeline.fireChannelActive();
            }
        });
    }

    safeSetSuccess(promise);
}
doBind()又会调回到
NioServerSocketChannel.doBind(),其实就是调用JDK原生的ServerSocketChannel.bind(localAddress , backlog),源码如下:
@SuppressJava6Requirement(reason = "Usage guarded by java version check")
@Override
protected void doBind(SocketAddress localAddress) throws Exception {
    if (PlatformDependent.javaVersion() >= 7) {
        // 获取JDK的ServerSocketChannel.bind()
        javaChannel().bind(localAddress, config.getBacklog());
    } else {
        javaChannel().socket().bind(localAddress, config.getBacklog());
    }
}
绑定成功后就可以正常处理客户端的接入了,之后客户端Channel都会由WorkerGroup驱动IO的读写。
这篇文章分析了Netty服务端启动的全流程,从ServerSocketChannel的创建到绑定端口,再到BossGroup驱动客户端连接的接入和WorkerGroup驱动数据的读写。
还重点分析了NioEventLoopGroup和NioEventLoop的工作模式,认真读完,相信你会对Netty整体的工作机制有所了解。
数据接收ByteBuf的分配,数据write的底层细节没有介绍到,包括Netty对高性能所作的努力也还没有过多介绍,考虑到篇幅原因,后面会专门再开一篇文章。
写到这里就结束了,此时此刻,我的电脑编辑器已经非常卡了,艰难的敲下这段文字后,是时候说再见了!!!